Localization
Userflow makes it easy to reach users globally with multi-language support. Our localization feature enables you to create your content once, then translate the parts that need to be adjusted for different languages or regions, saving you time and effort.
Since you provide the translations (either manually or through our AI Translate feature), we can support virtually any language you need. If you don’t see a specific locale in our list, reach out to our support team, and we’ll be happy to help add it for you.
- About locales
- Add your locales
- Set users’ locale code
- Enabling users to see translated content
- Right-to-left (RTL) languages
- Translating content
- Automatically translate text using AI-powered localization
- Translating text with formatting
- Translating text with placeholders
- Translating images
- Translating videos
- Translating element text
- Editing existing translations
- Editing the original content
- Export and import
About locales
A locale is a combination of a user’s language and region. English is a language. English (US) is a locale.
Your Userflow account contains a list of locales for which you can translate your content. Please note that your subscription plan may have a limit on the number of locales your account supports. If you require additional locales, please contact our support team to inquire about upgrading.
One of the locales in the list will be your company’s default locale. If your company is primarily English-speaking, this could be English (US).
Each piece of content (for example, a flow) has a base locale, indicating the language used to create the content. New content defaults to using the default locale. To keep things simple, we recommend building all content in the same base locale.
A piece of content can be translated by providing translations from the base locale to each of the other locales.
Add your locales
Start by creating all the locales you will use.
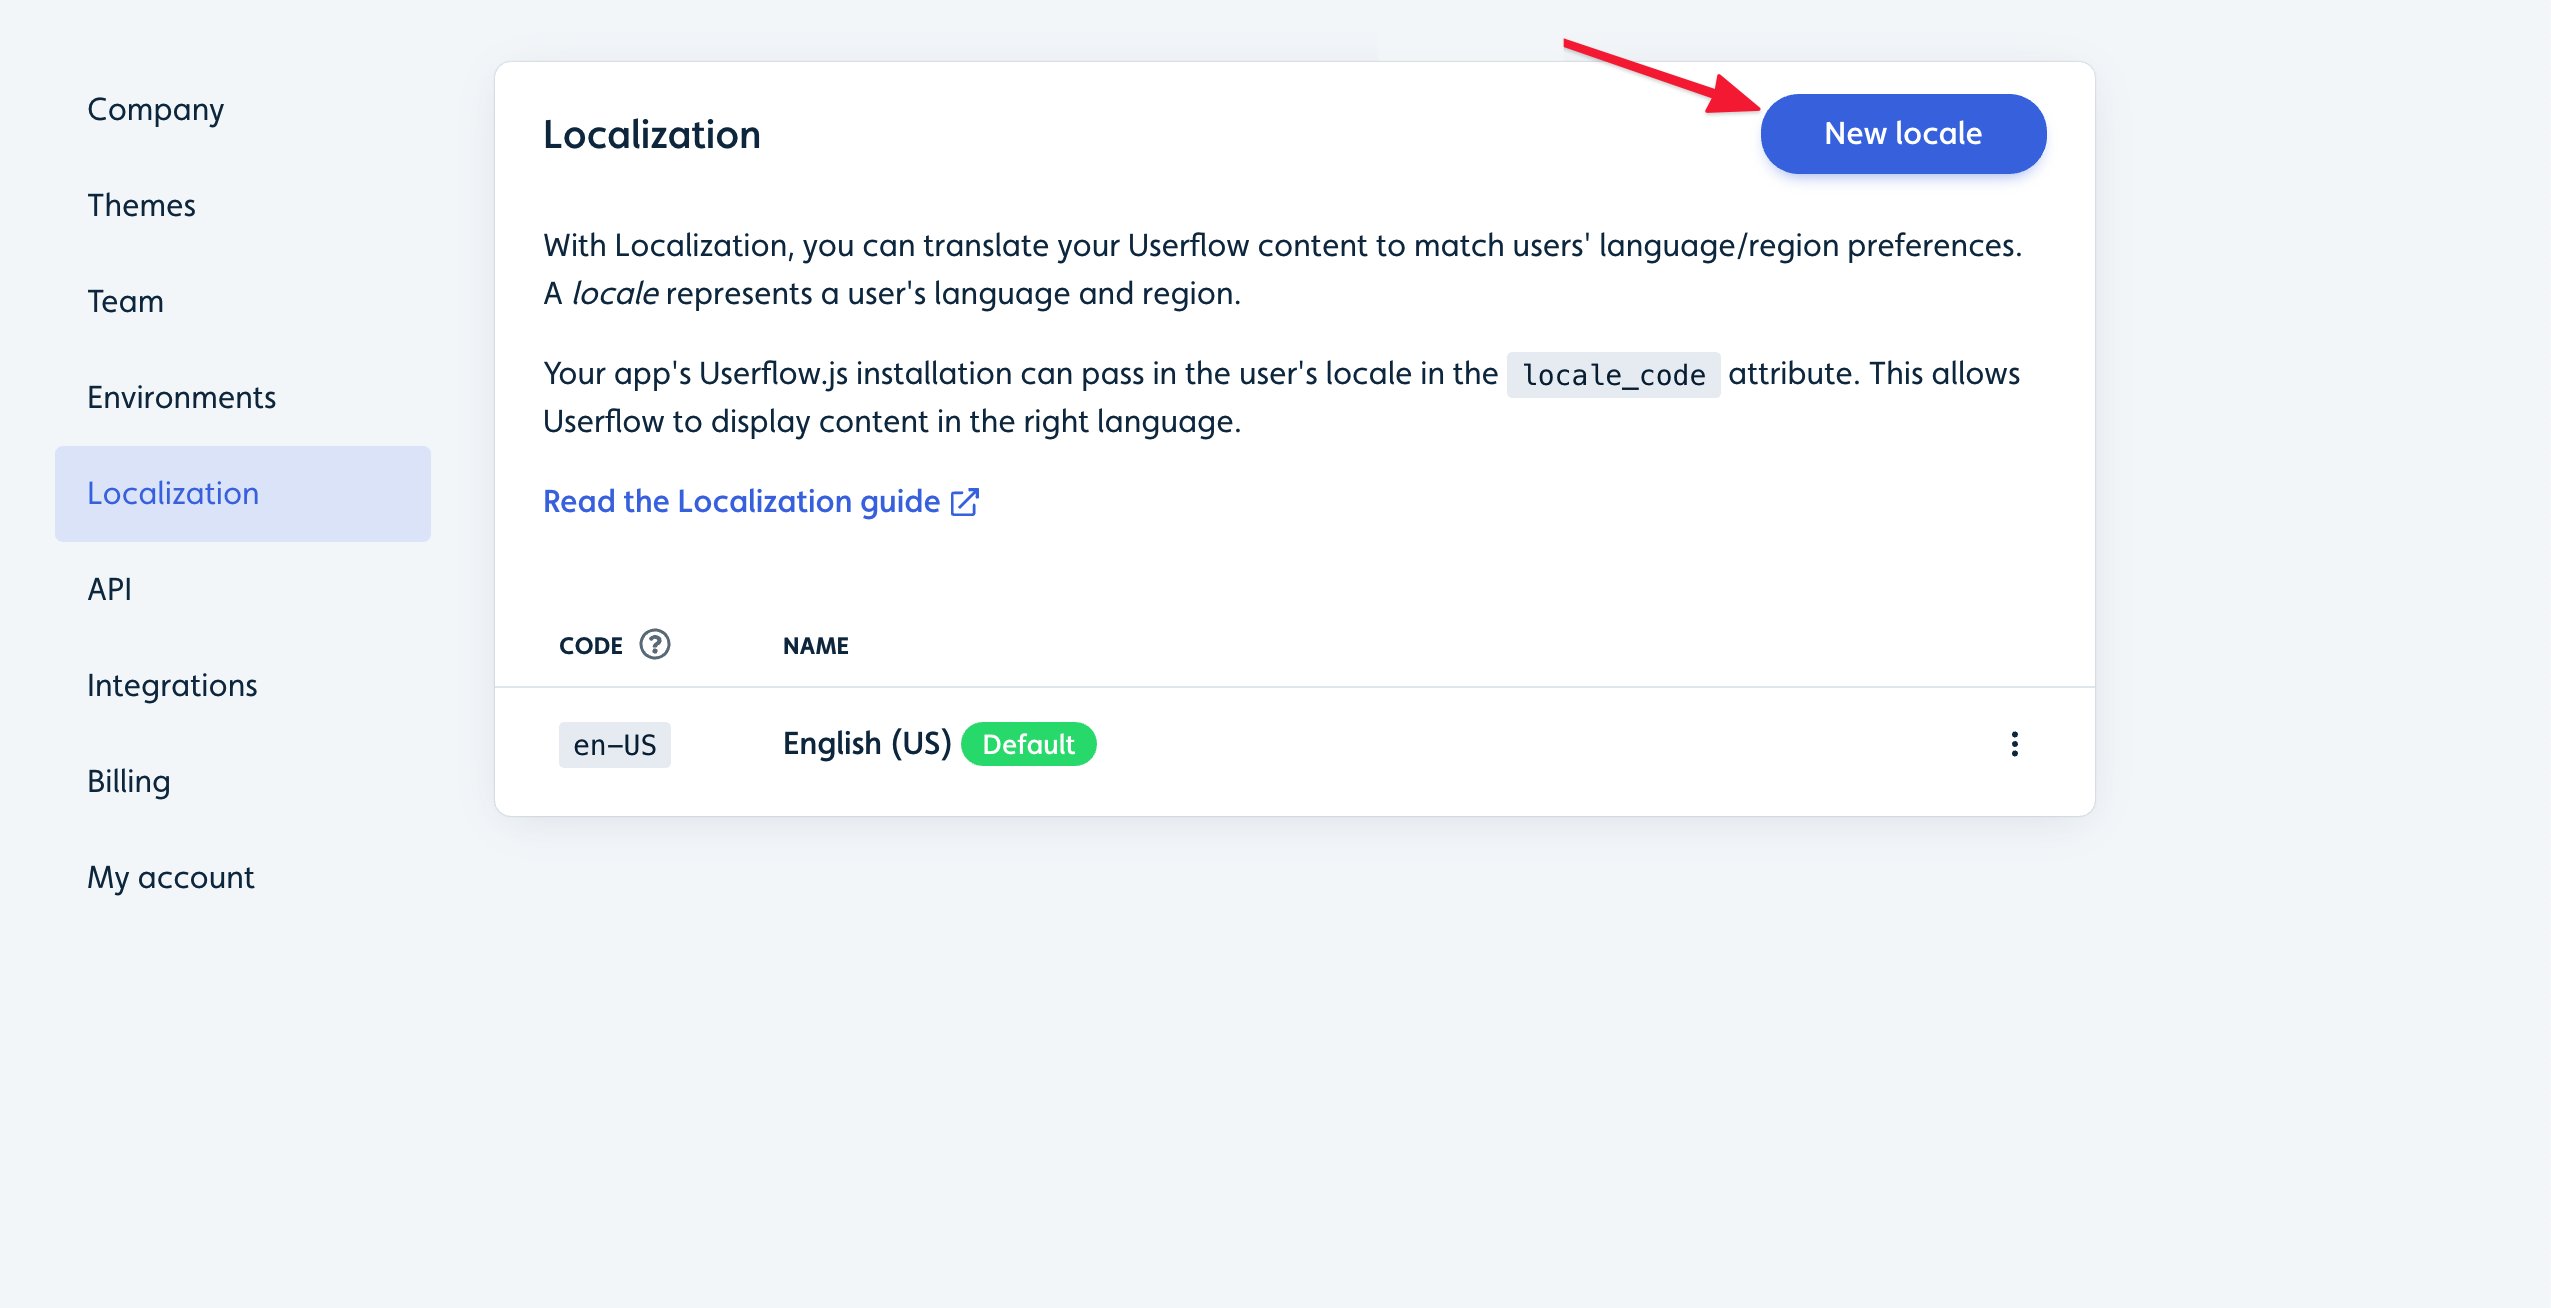
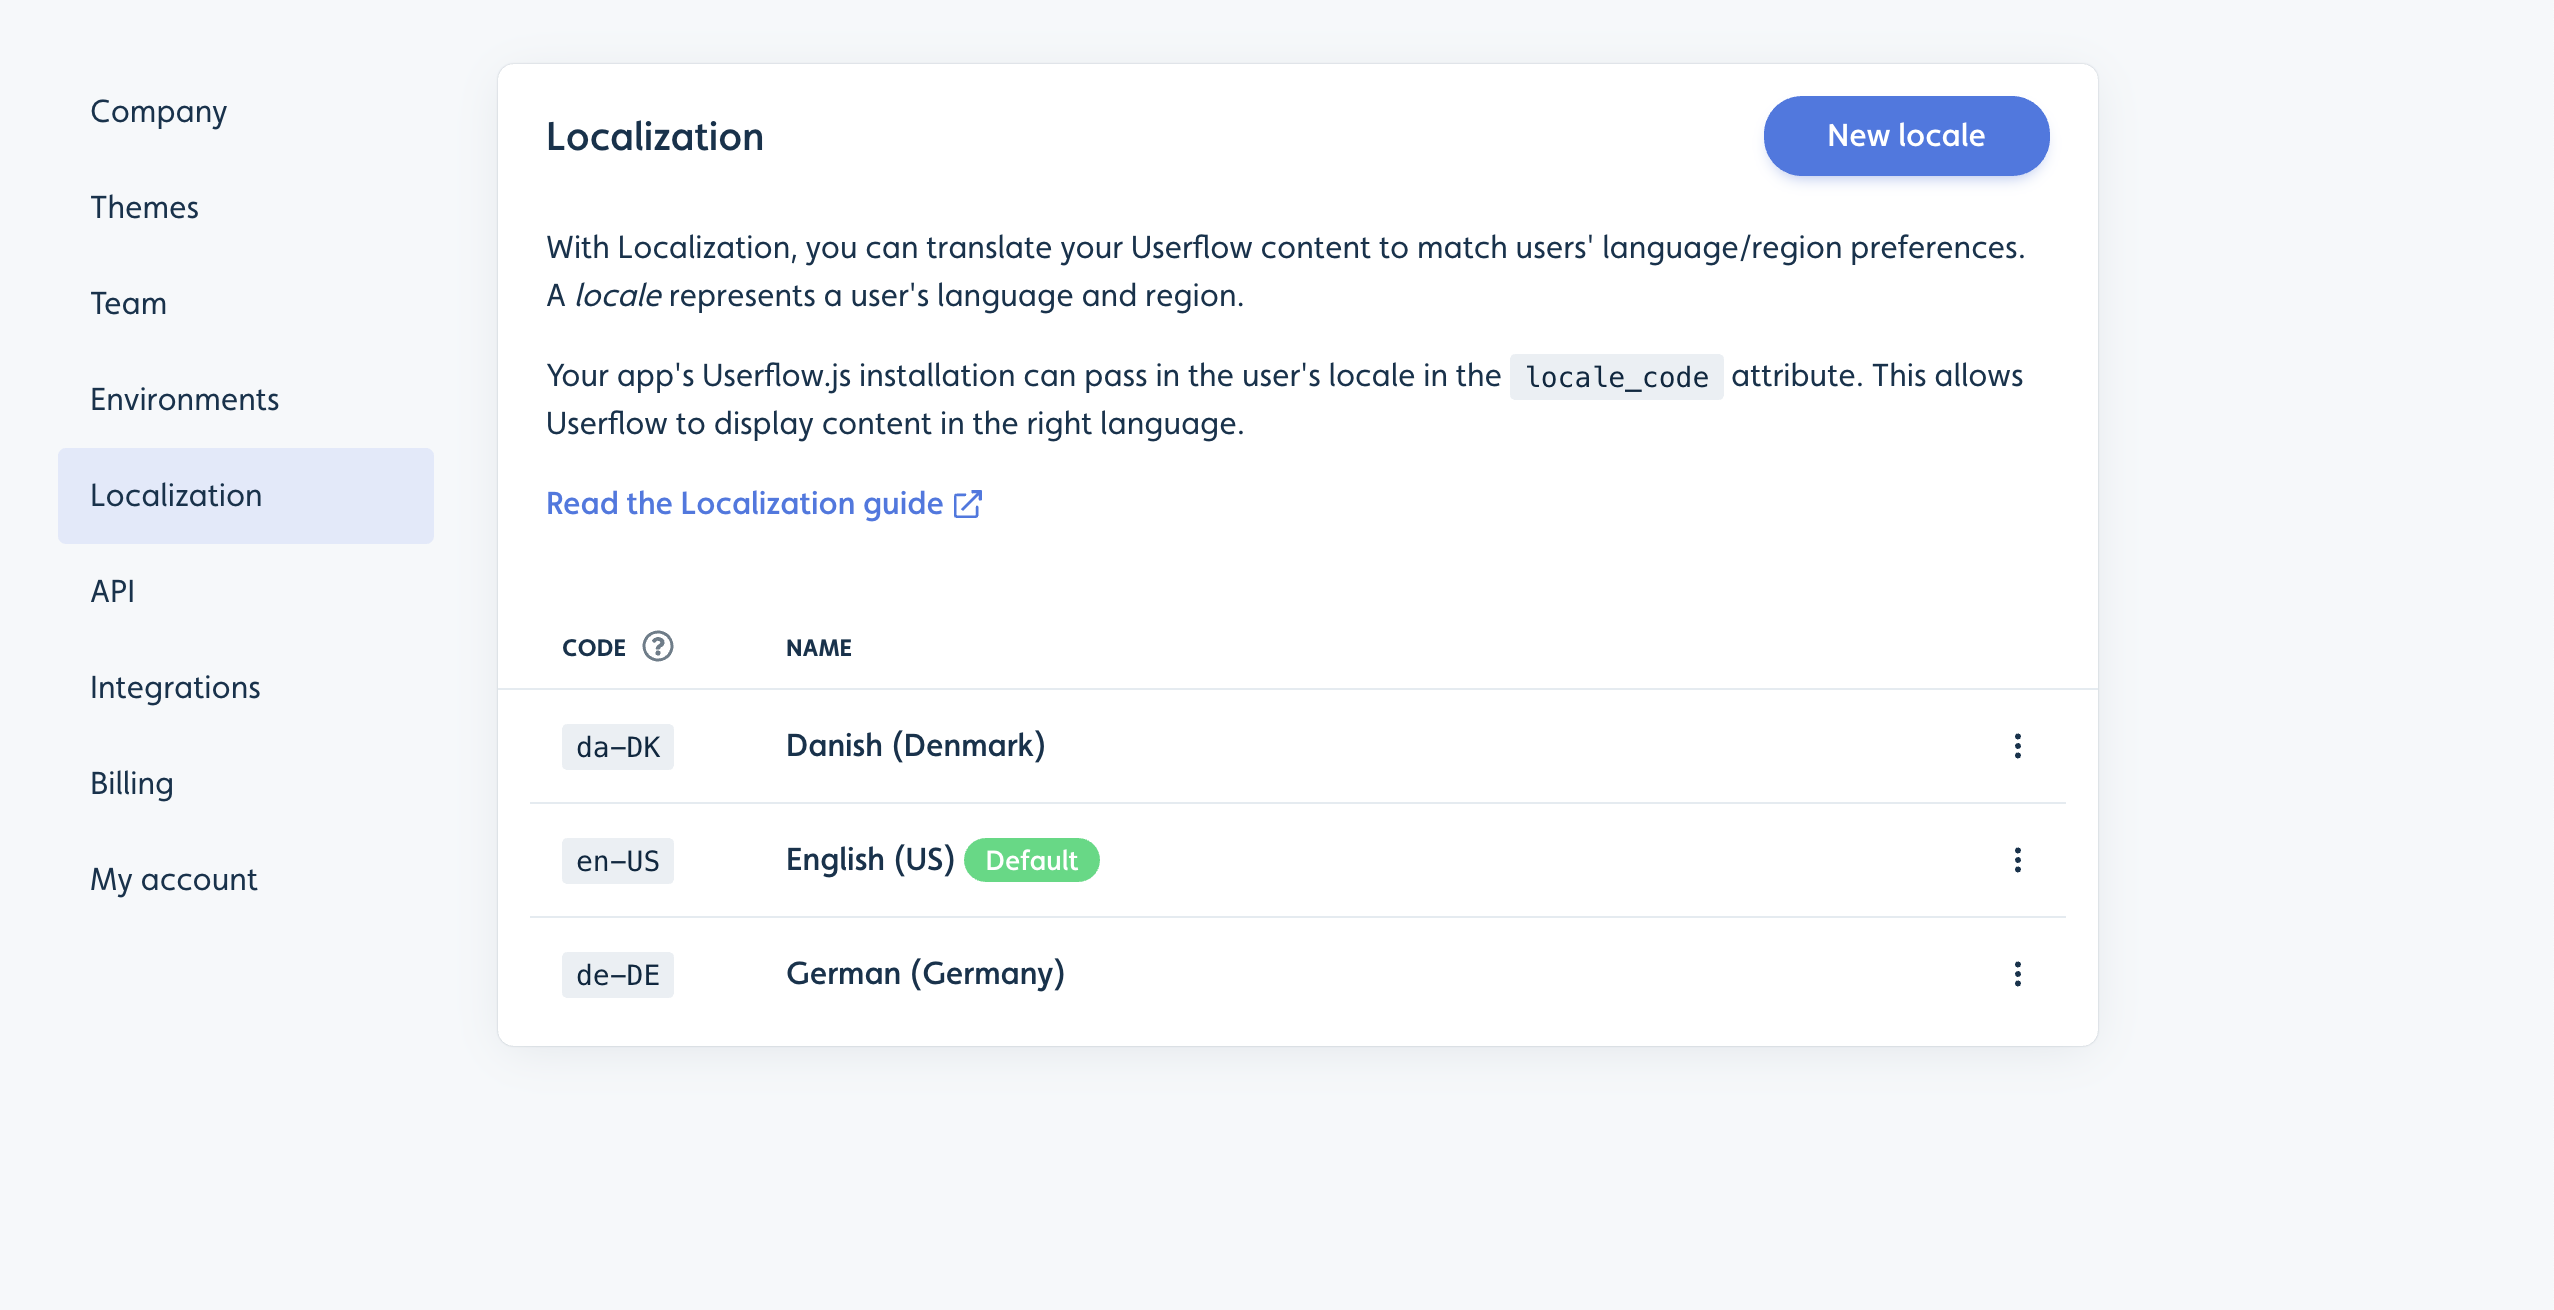
- Select Settings > Localization.
-
Click New locale.
-
Select the locale you want to add. Optionally adjust the Name and Code. The name is only used internally for your own purpose. The code is the value your Userflow.js installation must use (we’ll get to that below).
- Repeat Steps 2-3 for each additional locale you want.
-
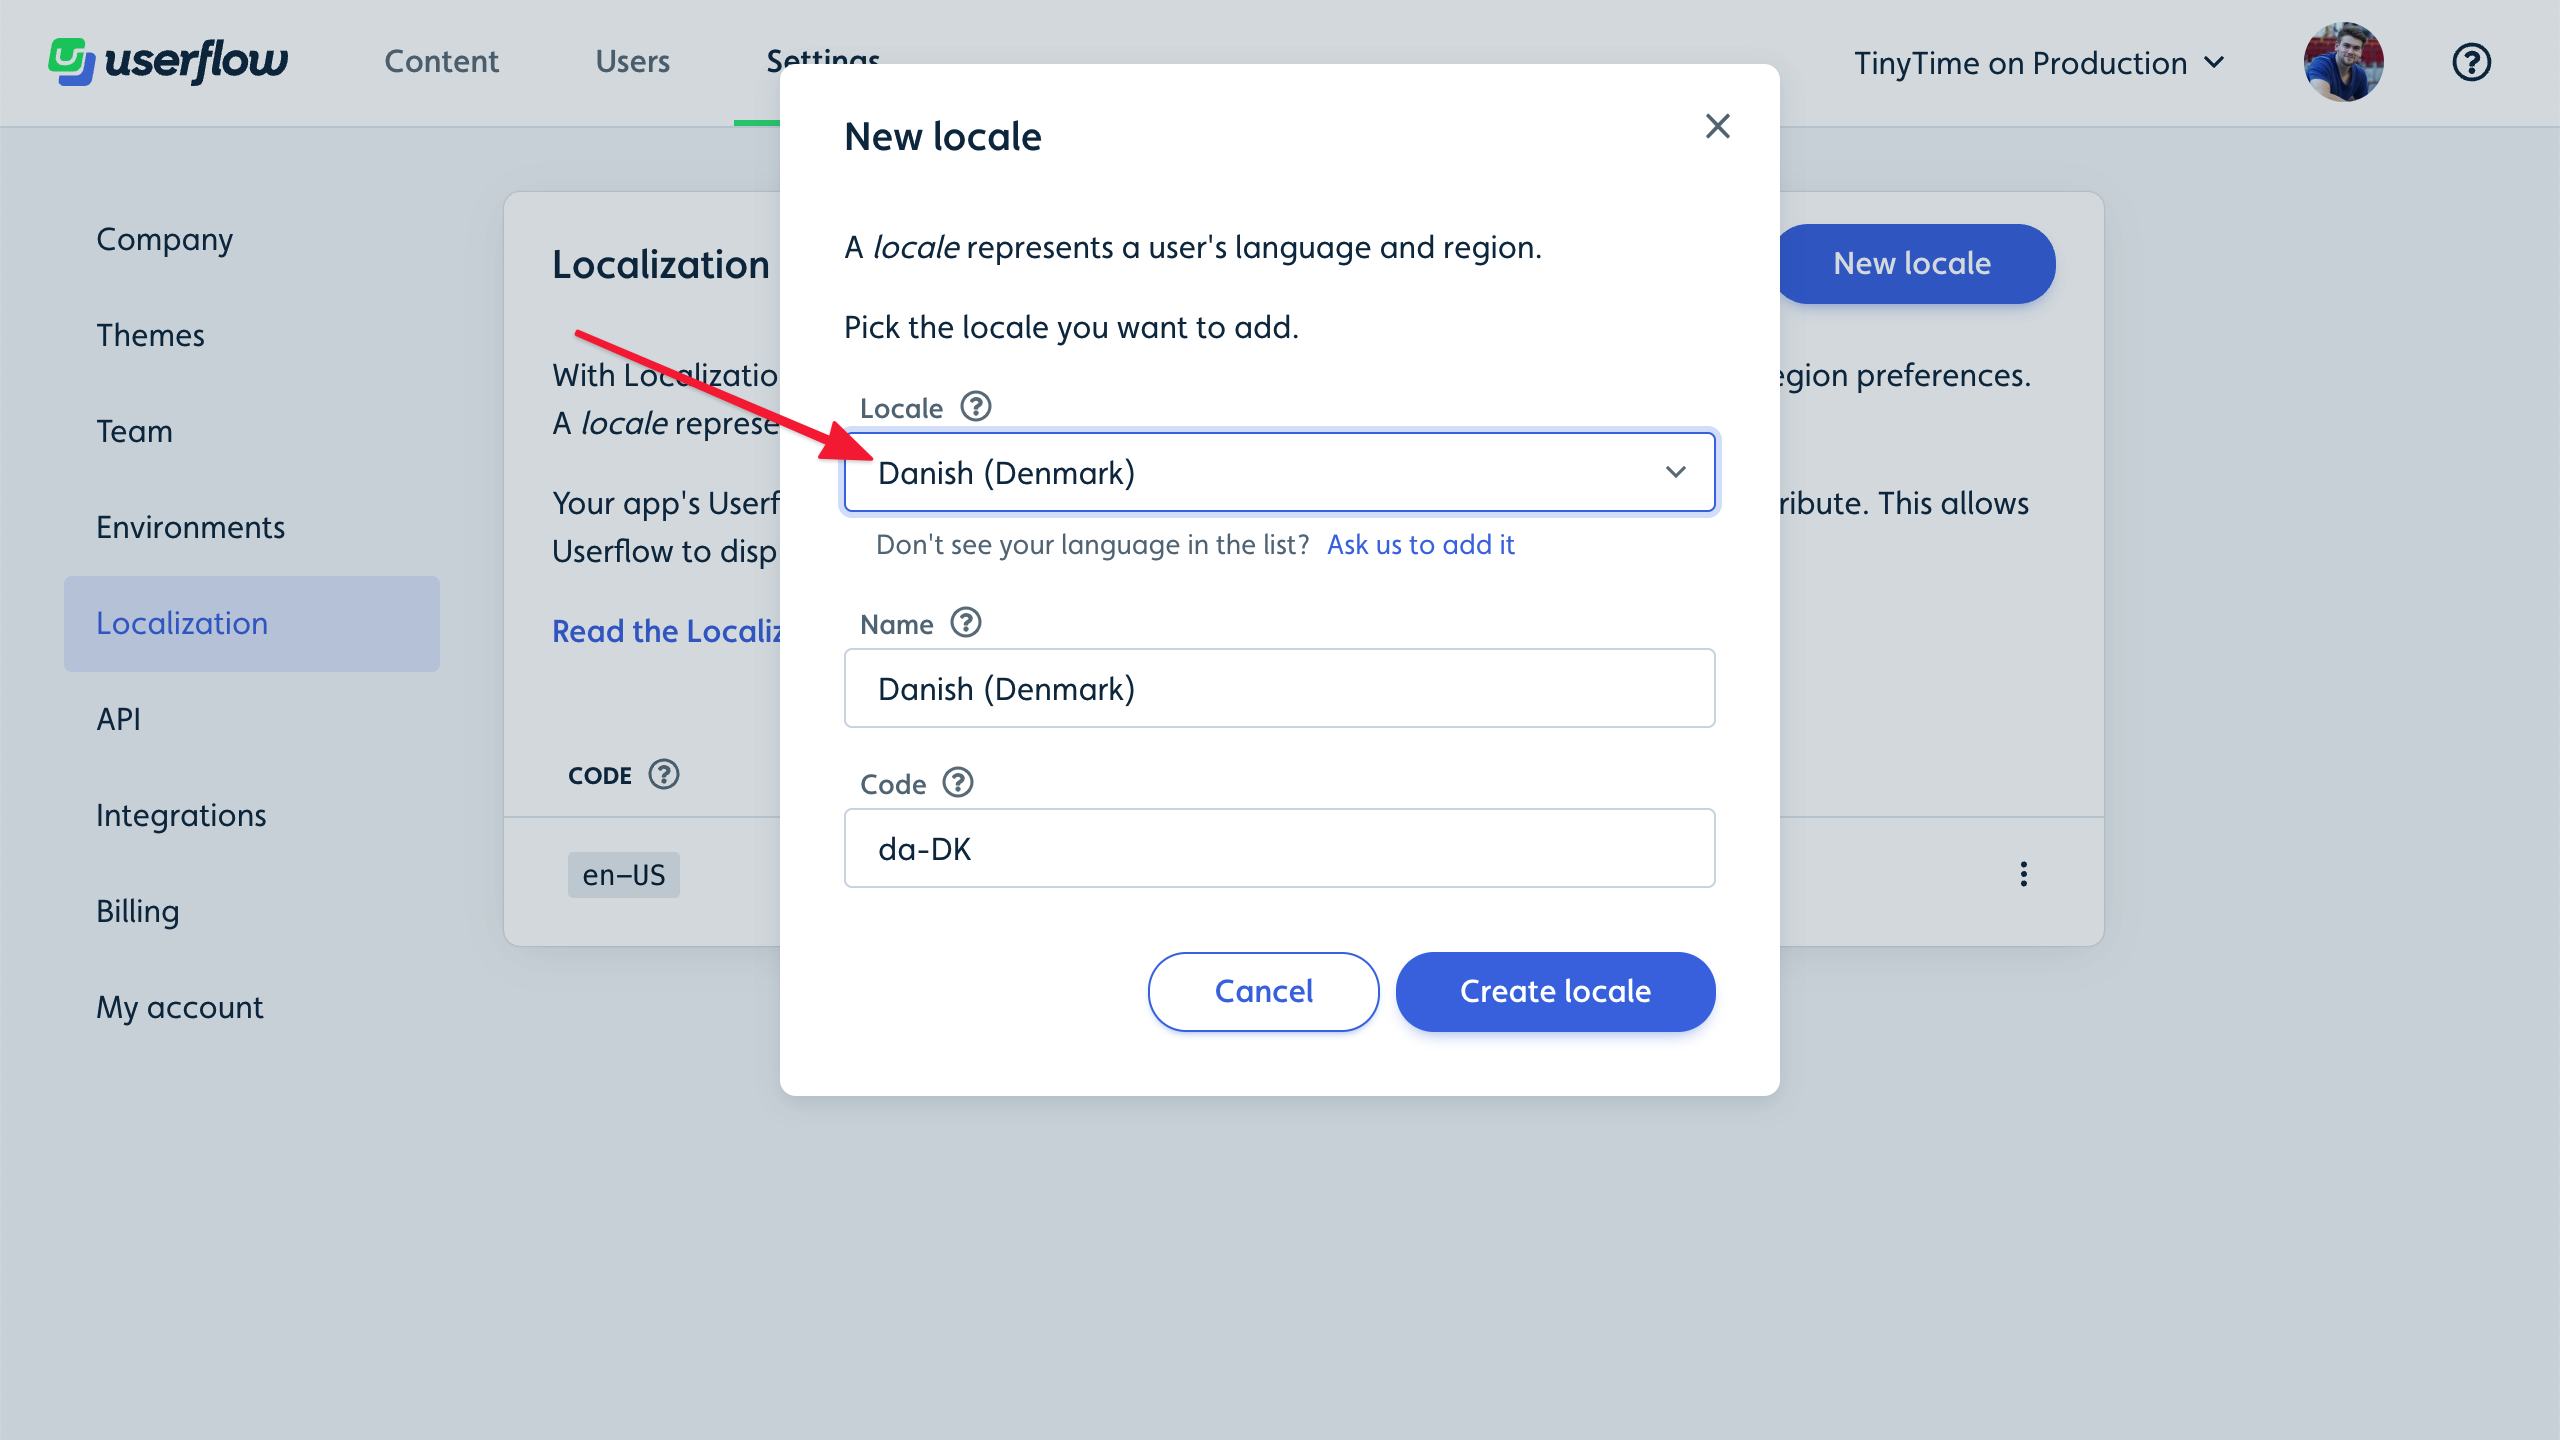
The list will now show all your locales. You can optionally pick another default locale using the three-dot buttons in the list.
Set users’ locale code
Next, make sure your Userflow.js installation informs Userflow of the current user’s locale.
By default, this involves sending a locale_code attribute in your userflow.identify() call.
You can retrieve the user’s locale from wherever it makes sense for your app. Many apps store this information in their user database, while others automatically detect it from the browser’s language settings. The key is to use the same method your app already uses for determining locale—this ensures your Userflow content will always appear in the same language as the rest of your application, creating a seamless experience for your users.
Example:
userflow.identify(user.id, {
  name: user.name,
  email: user.email,
  // MUST match one of your Userflow locales' code EXACTLY!
  locale_code: user.localeCode
})
If a user’s locale is not set or points to an unknown locale code, the user will be regarded as having no locale and will see content in the base locale only.
Enabling users to see translated content
Once you’ve added your locales, a new Localization tab will appear next to the Builder.
Until you enable it, content (for example, a flow) may only be visible to users of the base locale. If a user is registered with a different locale, the content will not display.
Switch on the Enabled toggle to allow users to see the content in this locale:

The flow is now enabled for this locale. Remember that these changes won’t be visible to users until you publish them, just like any other content updates. Be sure to add your translations before publishing to ensure users see the content in their preferred language.
Right-to-left (RTL) languages
Userflow supports right-to-left languages, such as Arabic and Hebrew.

Translating content
Next, you’ll want to translate all the text, which you can do directly in Userflow. There are three ways to translate text:
-
Auto-translate using Userflow’s AI Translate capabilities.
-
Manually enter translations for each step/element.
-
Export and import translation files and share them with translators who don’t have access to your Userflow account.
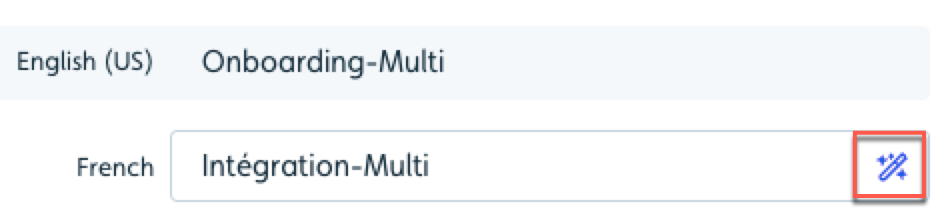
Tip: Are you manually entering a translation and need help getting it right? Use our AI-powered translation tool to generate translated text. See below to learn more.
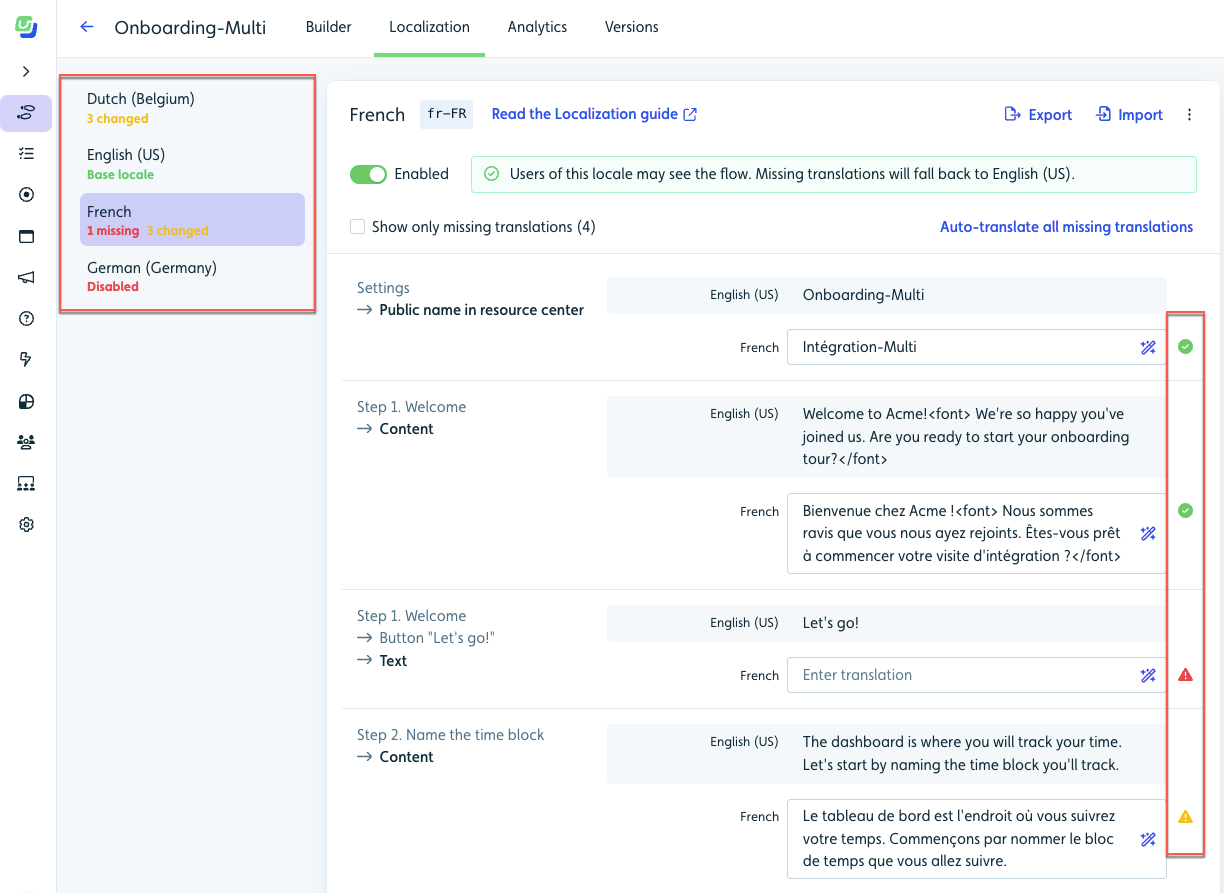
The translation status will be listed next to each enabled language on the left, and to the right of each translation.
- Red warning triangle: Translation is missing. Userflow will use the base locale text if a translation is missing.
- Yellow caution triangle: The original text the translation was based on has changed. Click the yellow triangle to accept the original translation, or regenerate/edit the translated text.
- Green checkmark: The translation is present, and the original text has not changed since the translation was created.
Automatically translate text using AI-powered localization
Our AI-powered localization feature streamlines localization workflows, enabling the management of international launches, processing of large translation volumes, and maintenance of consistent localized experiences. By leveraging contextual AI technology, this feature eliminates manual translation bottlenecks, enabling faster go-to-market timelines and reduced manual effort.
The system automatically identifies missing translations and generates accurate, contextually-aware content across all supported languages, ensuring consistency and completeness while allowing teams to focus on strategic review rather than manual translation work. This scalable solution helps anyone managing multi-language customers accelerate content delivery without requiring dedicated language experts for every update.
To auto-translate text:
- Select and enable the language for which you want to complete translations.
-
Select Auto-translate all missing translations. This will complete missing translations and update translations whose original text has been revised.
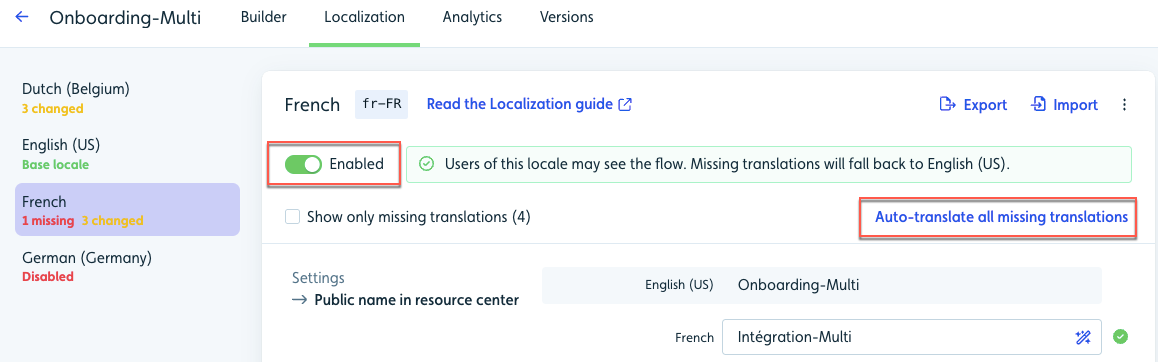
- Review and edit translations if needed.
Different content types, such as images and formatting, offer more advanced levels of customization. In the following sections, we’ll explore each content type in detail, highlighting its unique capabilities and optimal implementation strategies.
Translating text with formatting
When your text contains formatting (for example, bold text), Userflow intelligently extracts the text and wraps up the formatting in simple HTML-like tags.

This makes it easy for translators to understand the whole sentence, without having to translate each individual segment out of context.
Note that the HTML tags don’t necessarily correspond to real HTML. They refer to the actual formatting used in the paragraph, and Userflow will merge the translation into the same formatting when it’s displayed to users. This means, you can’t use any tag names (e.g. <b>) other than the exact ones you see in the original text.
Translating text with placeholders
When your text contains rich content elements such as a user attribute, Userflow replaces them in the translation text wrapped in curly braces:

Make sure to use the exact same word between the curly braces. You can’t use any words between the curly braces other than the exact ones you see in the original text.
Translating images
Images may or may not require translation. When Userflow encounters an image in your content, it will look like this on the Localization page:
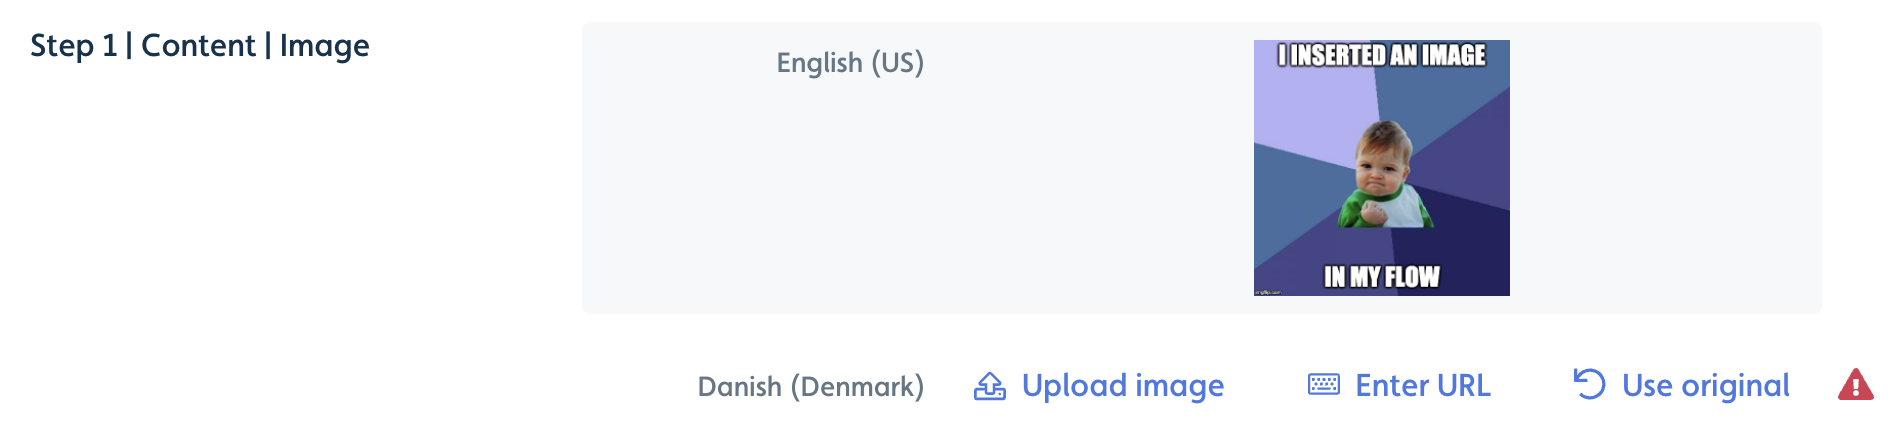
If the image is a pure graphic with no text, click Use original.
If the image contains text in the base locale, try using a different image for the locale you’re translating to. Click Upload image to upload an image from your computer, or click Enter URL to point to an image you have hosted on the Internet.
Translating videos
When you insert a video in your content, enter its URL (for example, a YouTube URL). Under Localization, it will appear as a text field containing the video URL:

You can either enter another video URL to use a localized version of the video or simply use the same value.
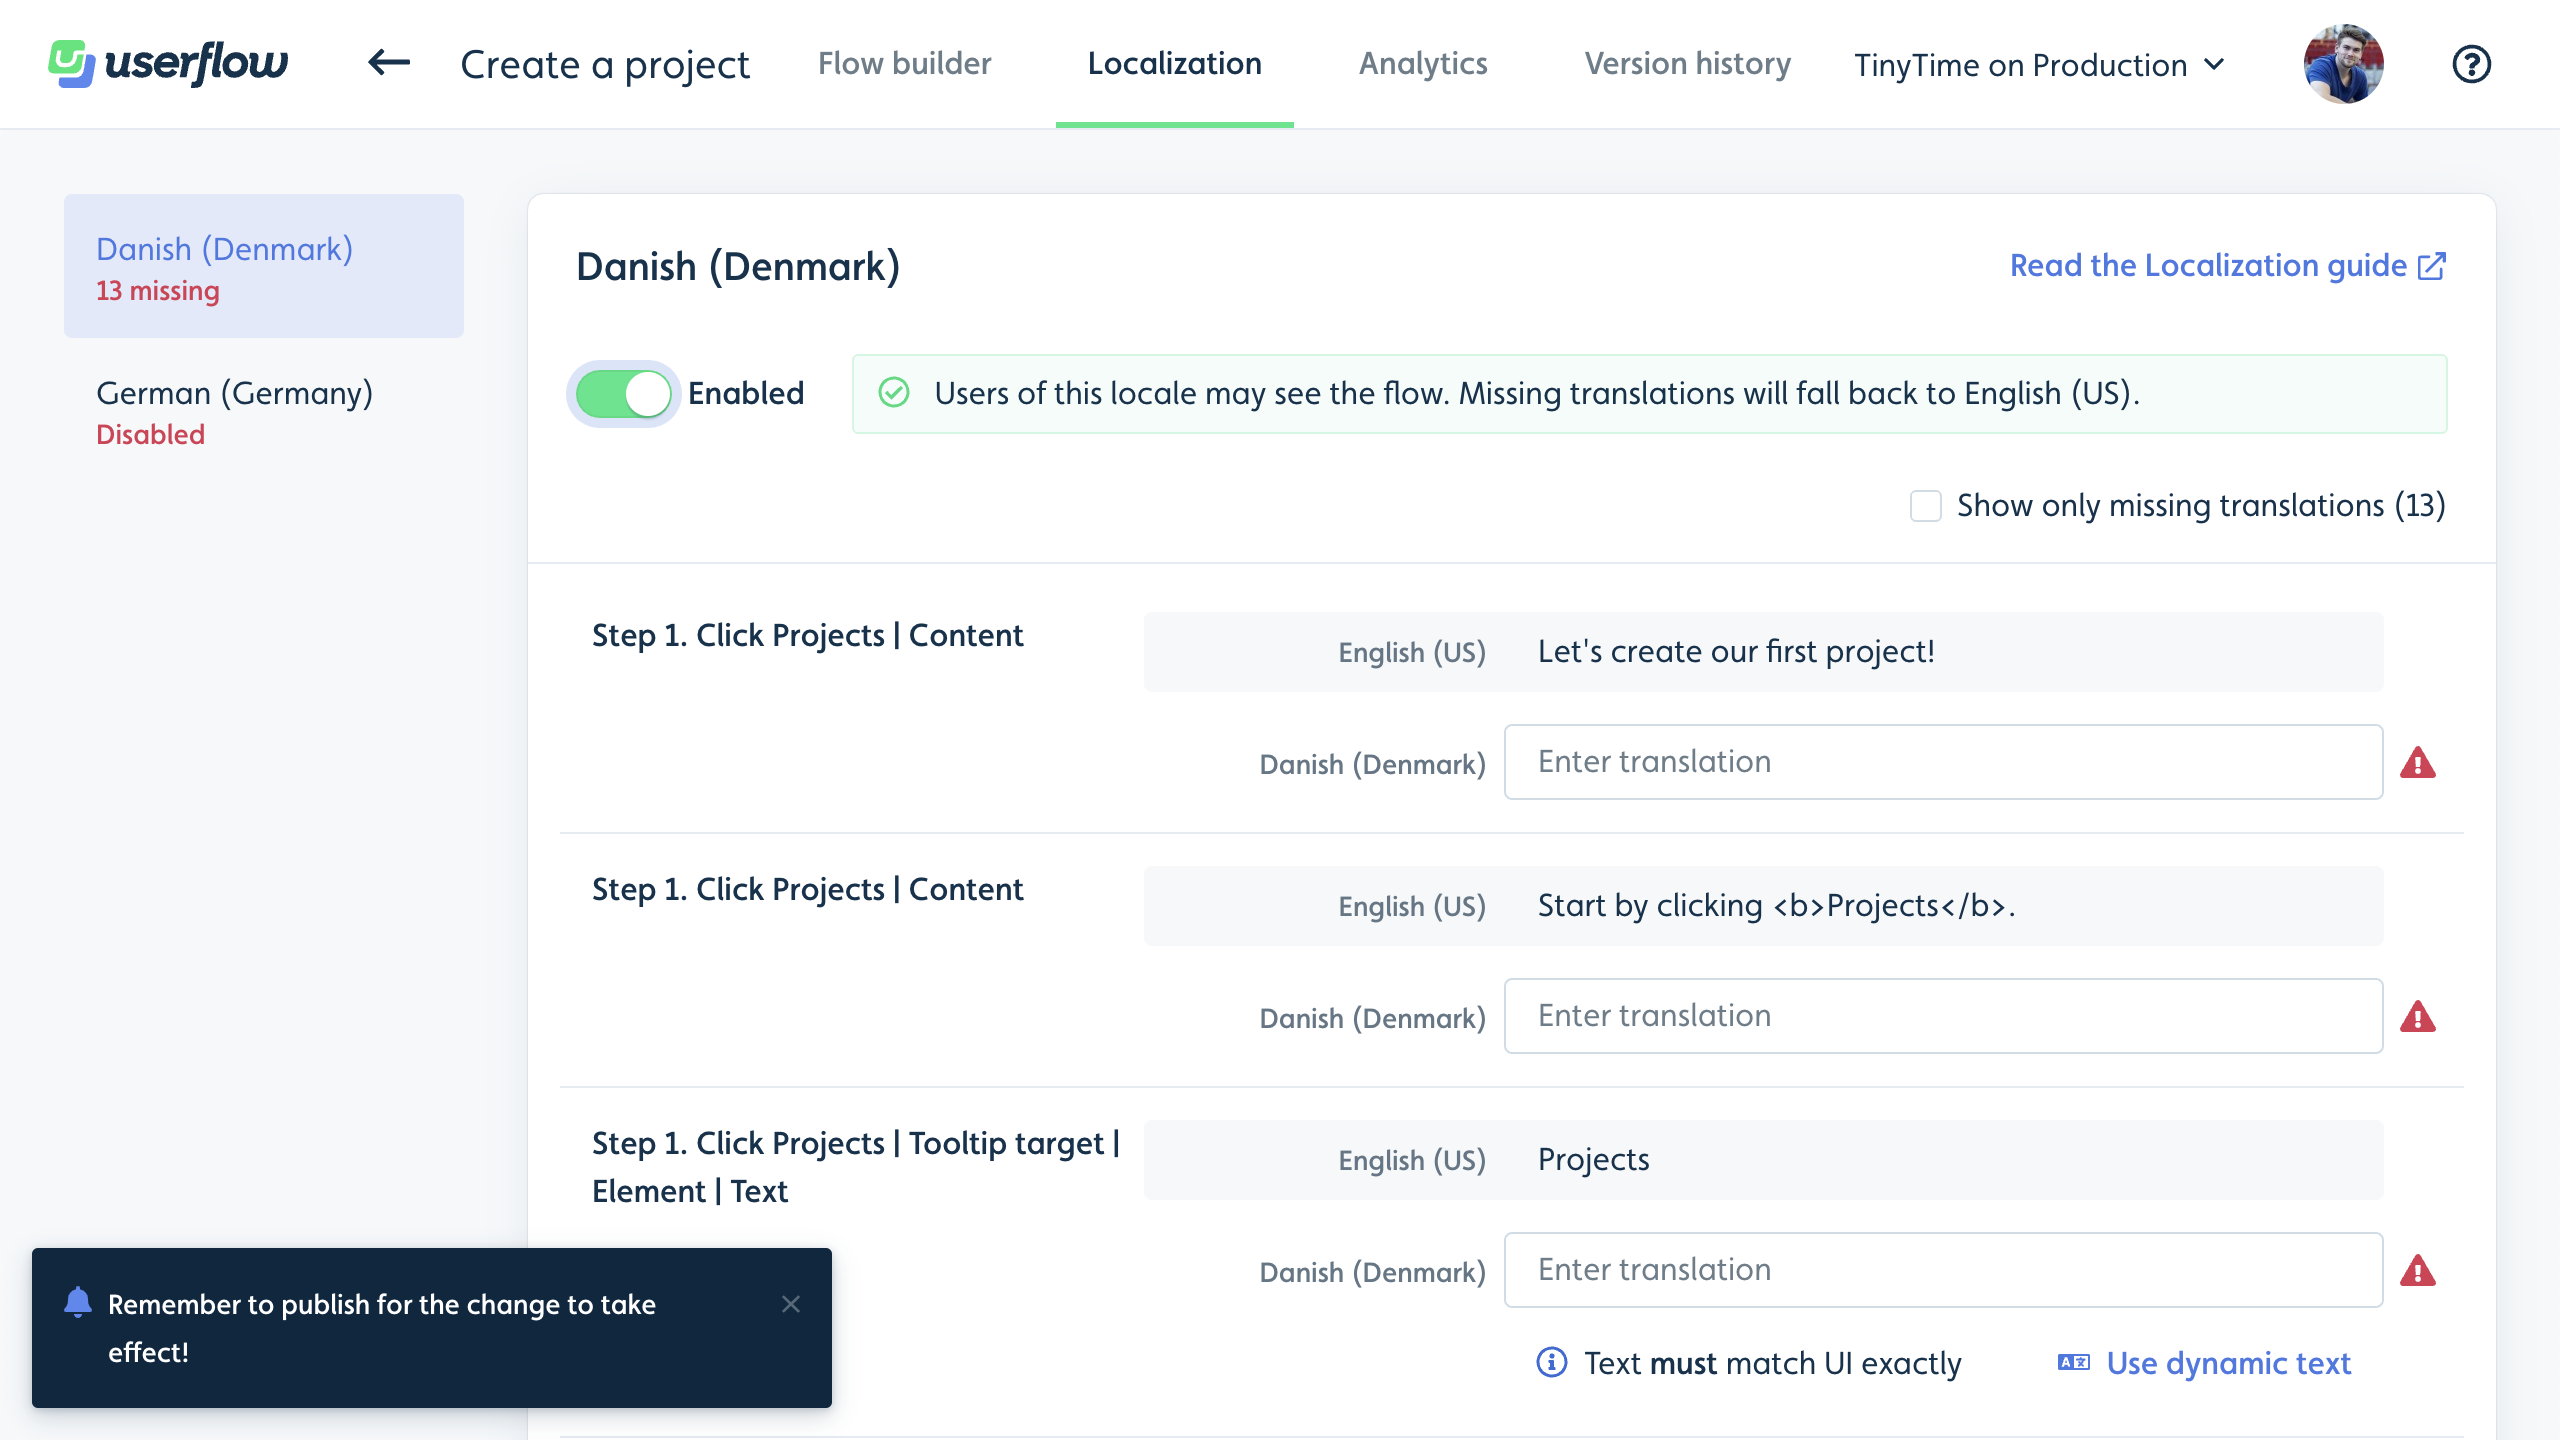
Translating element text
When you select elements (for example, to anchor to a tooltip in a flow), Userflow may use the text of the element to target it.
If Userflow chooses to use the text, and you don’t select the Dynamic text checkbox in the builder, the text of the element will need to be translated:

Important: The translated text you enter must match the text in your UI exactly. In the screenshot above, a Projects menu item has been selected in the English version of our app. If the same menu item is called ’Projekter’ in the Danish version of our app, we must write ’Projekter’ exactly for Userflow to be able to find the element.
Alternatively, you can click Use dynamic text, which instructs Userflow to find the element without relying on the text. This has the same effect as when you select Dynamic text in the builder.
We highly recommend testing the complete flow in the given locale before publishing it to ensure that all elements are found correctly.
Editing existing translations
You can edit existing translations at any time by making changes and republishing them.
Editing the original content
You are free to edit the original content as needed and at your discretion.
If you change any text in the original content, Userflow will detect this change and reflect it on the Localization page with a yellow warning triangle:
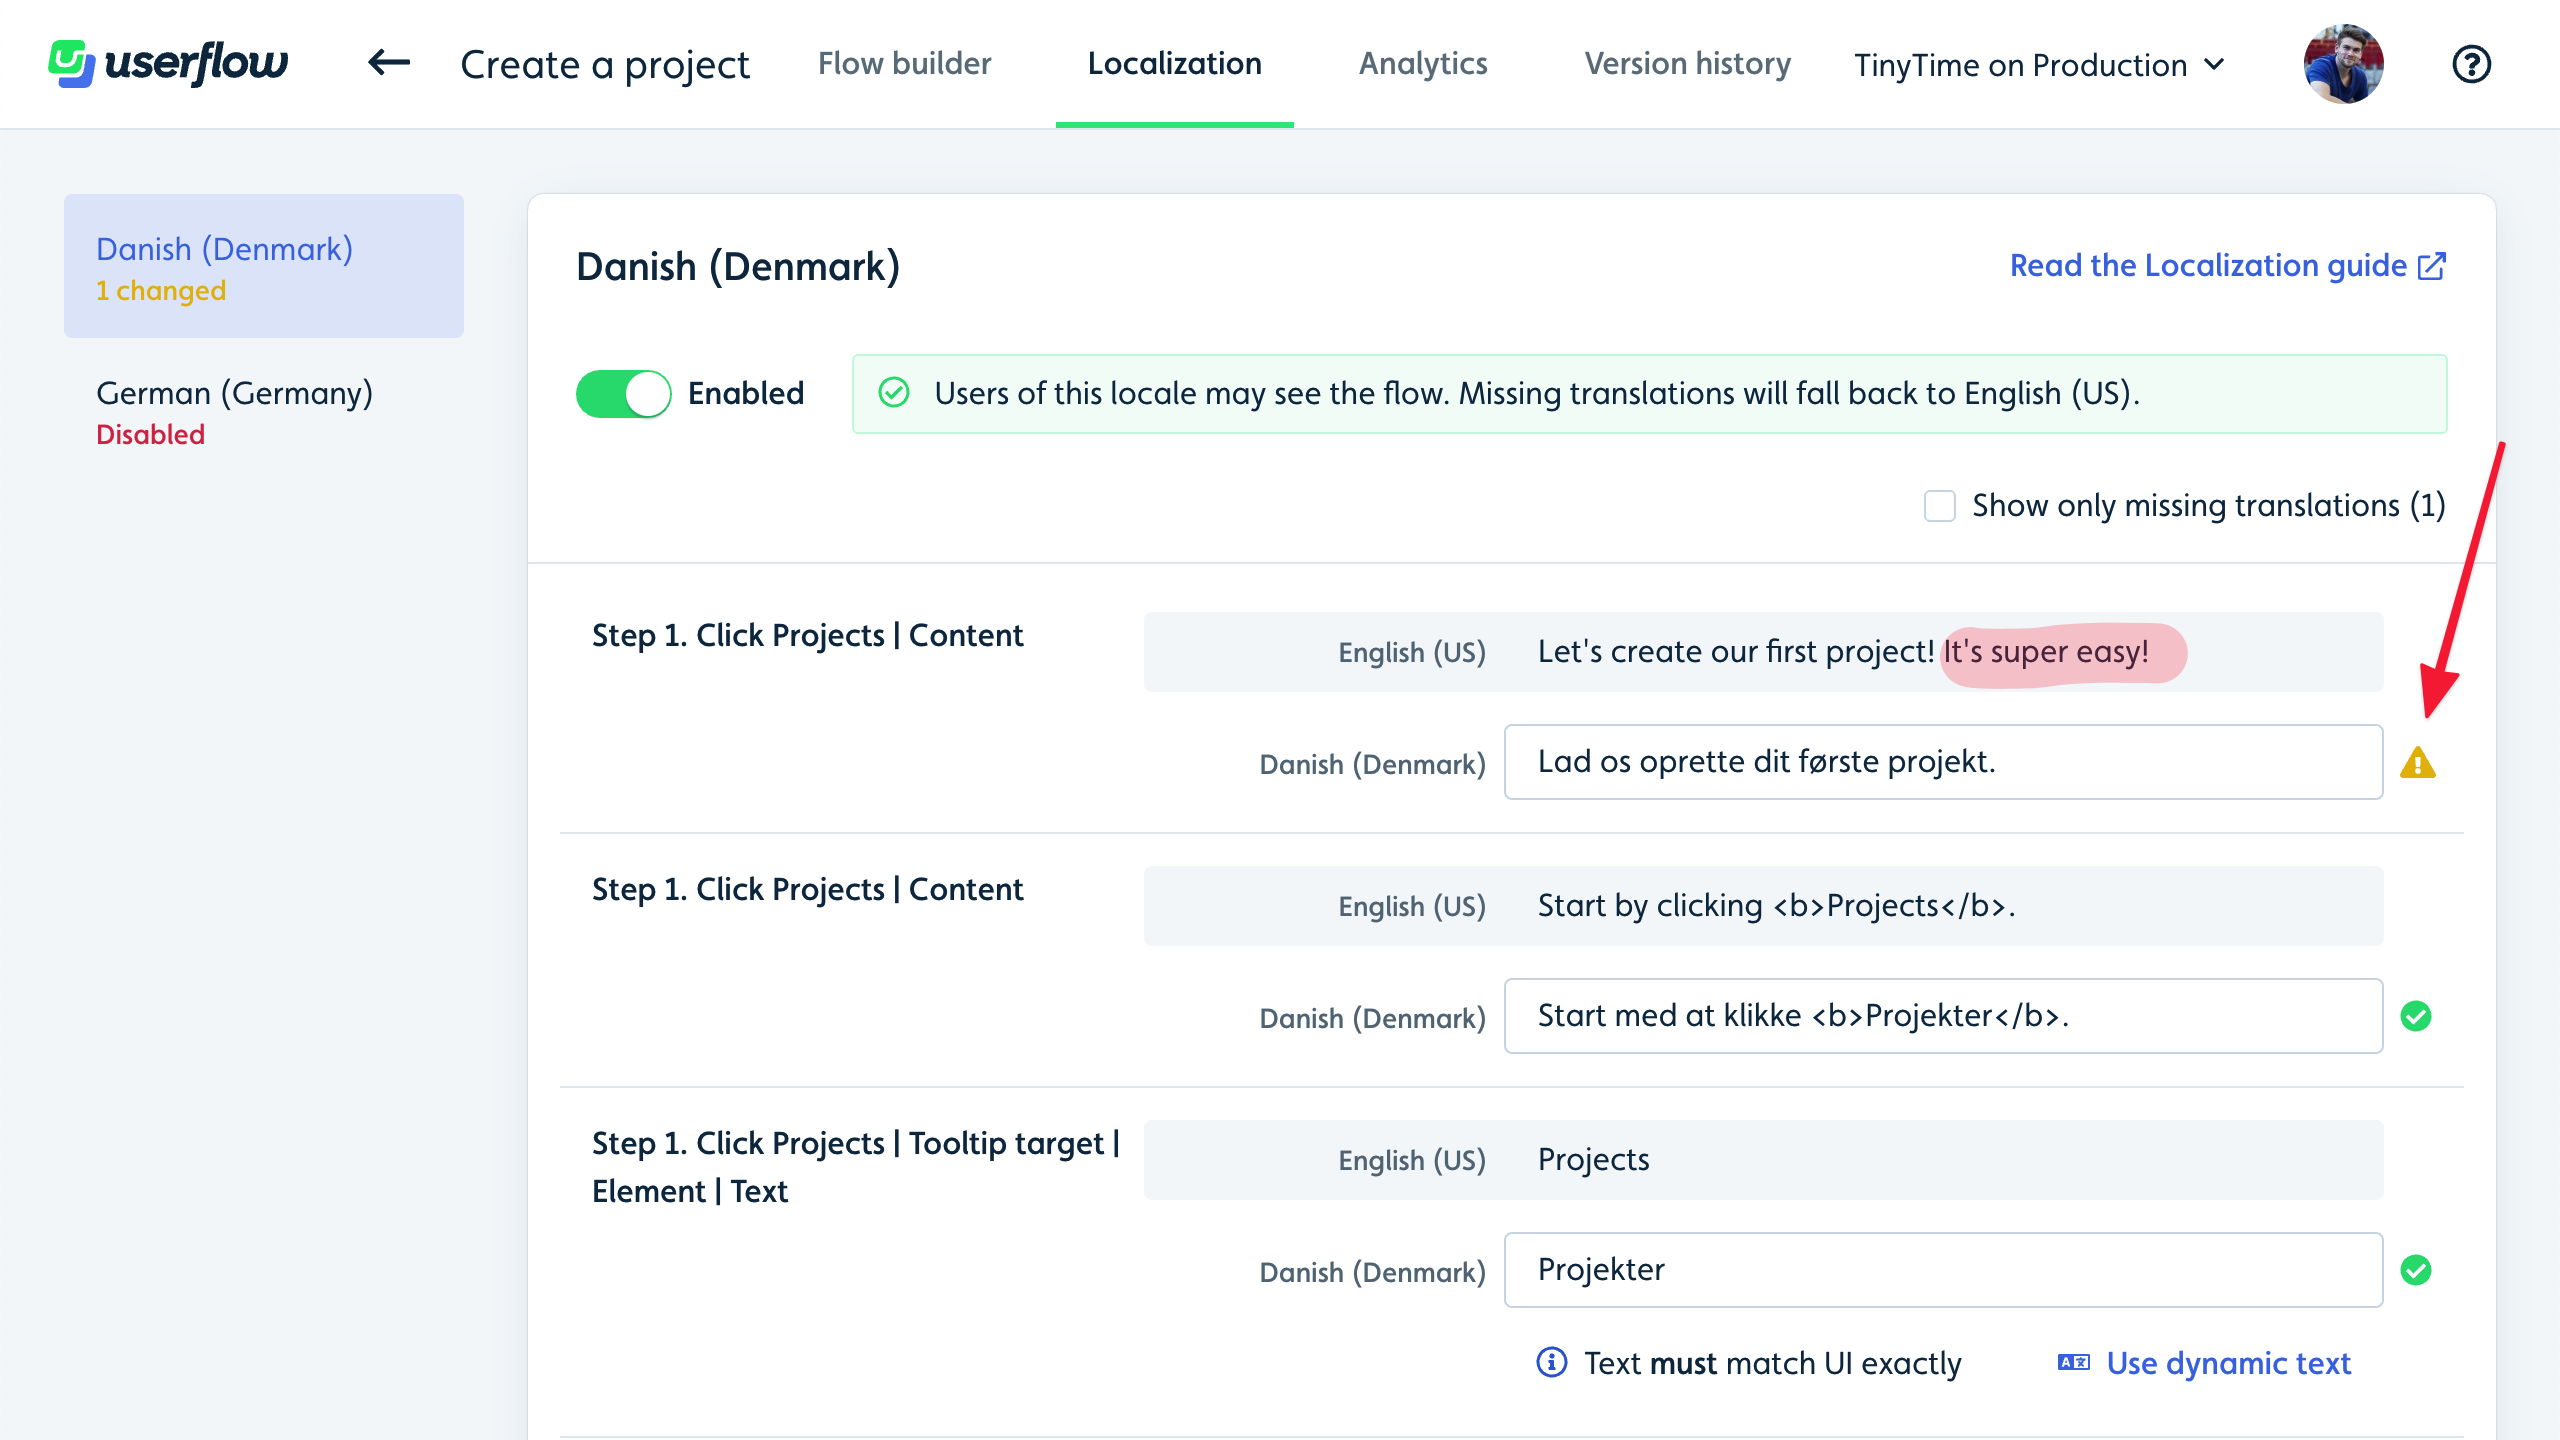
In this screenshot, notice how an extra sentence has been added to the first text. Adjust the translation to match it, and the icon will revert to a green checkmark.
If you were to publish the edited original content without fixing the outdated translation, the old translation would continue to display to users.
Export and import
You can export translation files from Userflow to let translators without Userflow access translate for you.
To export, click the Export button on the Localization tab under a flow. Once you receive the translation files back from your translator, you can import them through the Import button on the same page.
We support the following formats:
- CSV: Great if your translators do not use a translation platform. Your translators can open the CSV file in a spreadsheet editor and complete the translations.
- XLIFF: A well-supported XML standard that is supported by almost every translation platform. If you use such a translation platform, this is the easiest format to use.
The exported files contain the original texts in the base locale. This way, we can track if the original text changes in Userflow between exporting and importing.