A/B testing
It’s easy to A/B test all aspects of your Userflow content using our random attributes, which are automatically set to a random value for each user.
Table of contents
- Adding a Random A/B attribute
- A/B testing a flow
- A/B testing other things
- Split-testing with more than 2 groups
- Split-testing with more than 2 groups
- Using random attribute values in your analytics provider
Adding a Random A/B attribute
- Go to Settings → Attributes.
- Click New attribute.
- Enter a Display name such as “A/B Test Group”.
- Click Create attribute.
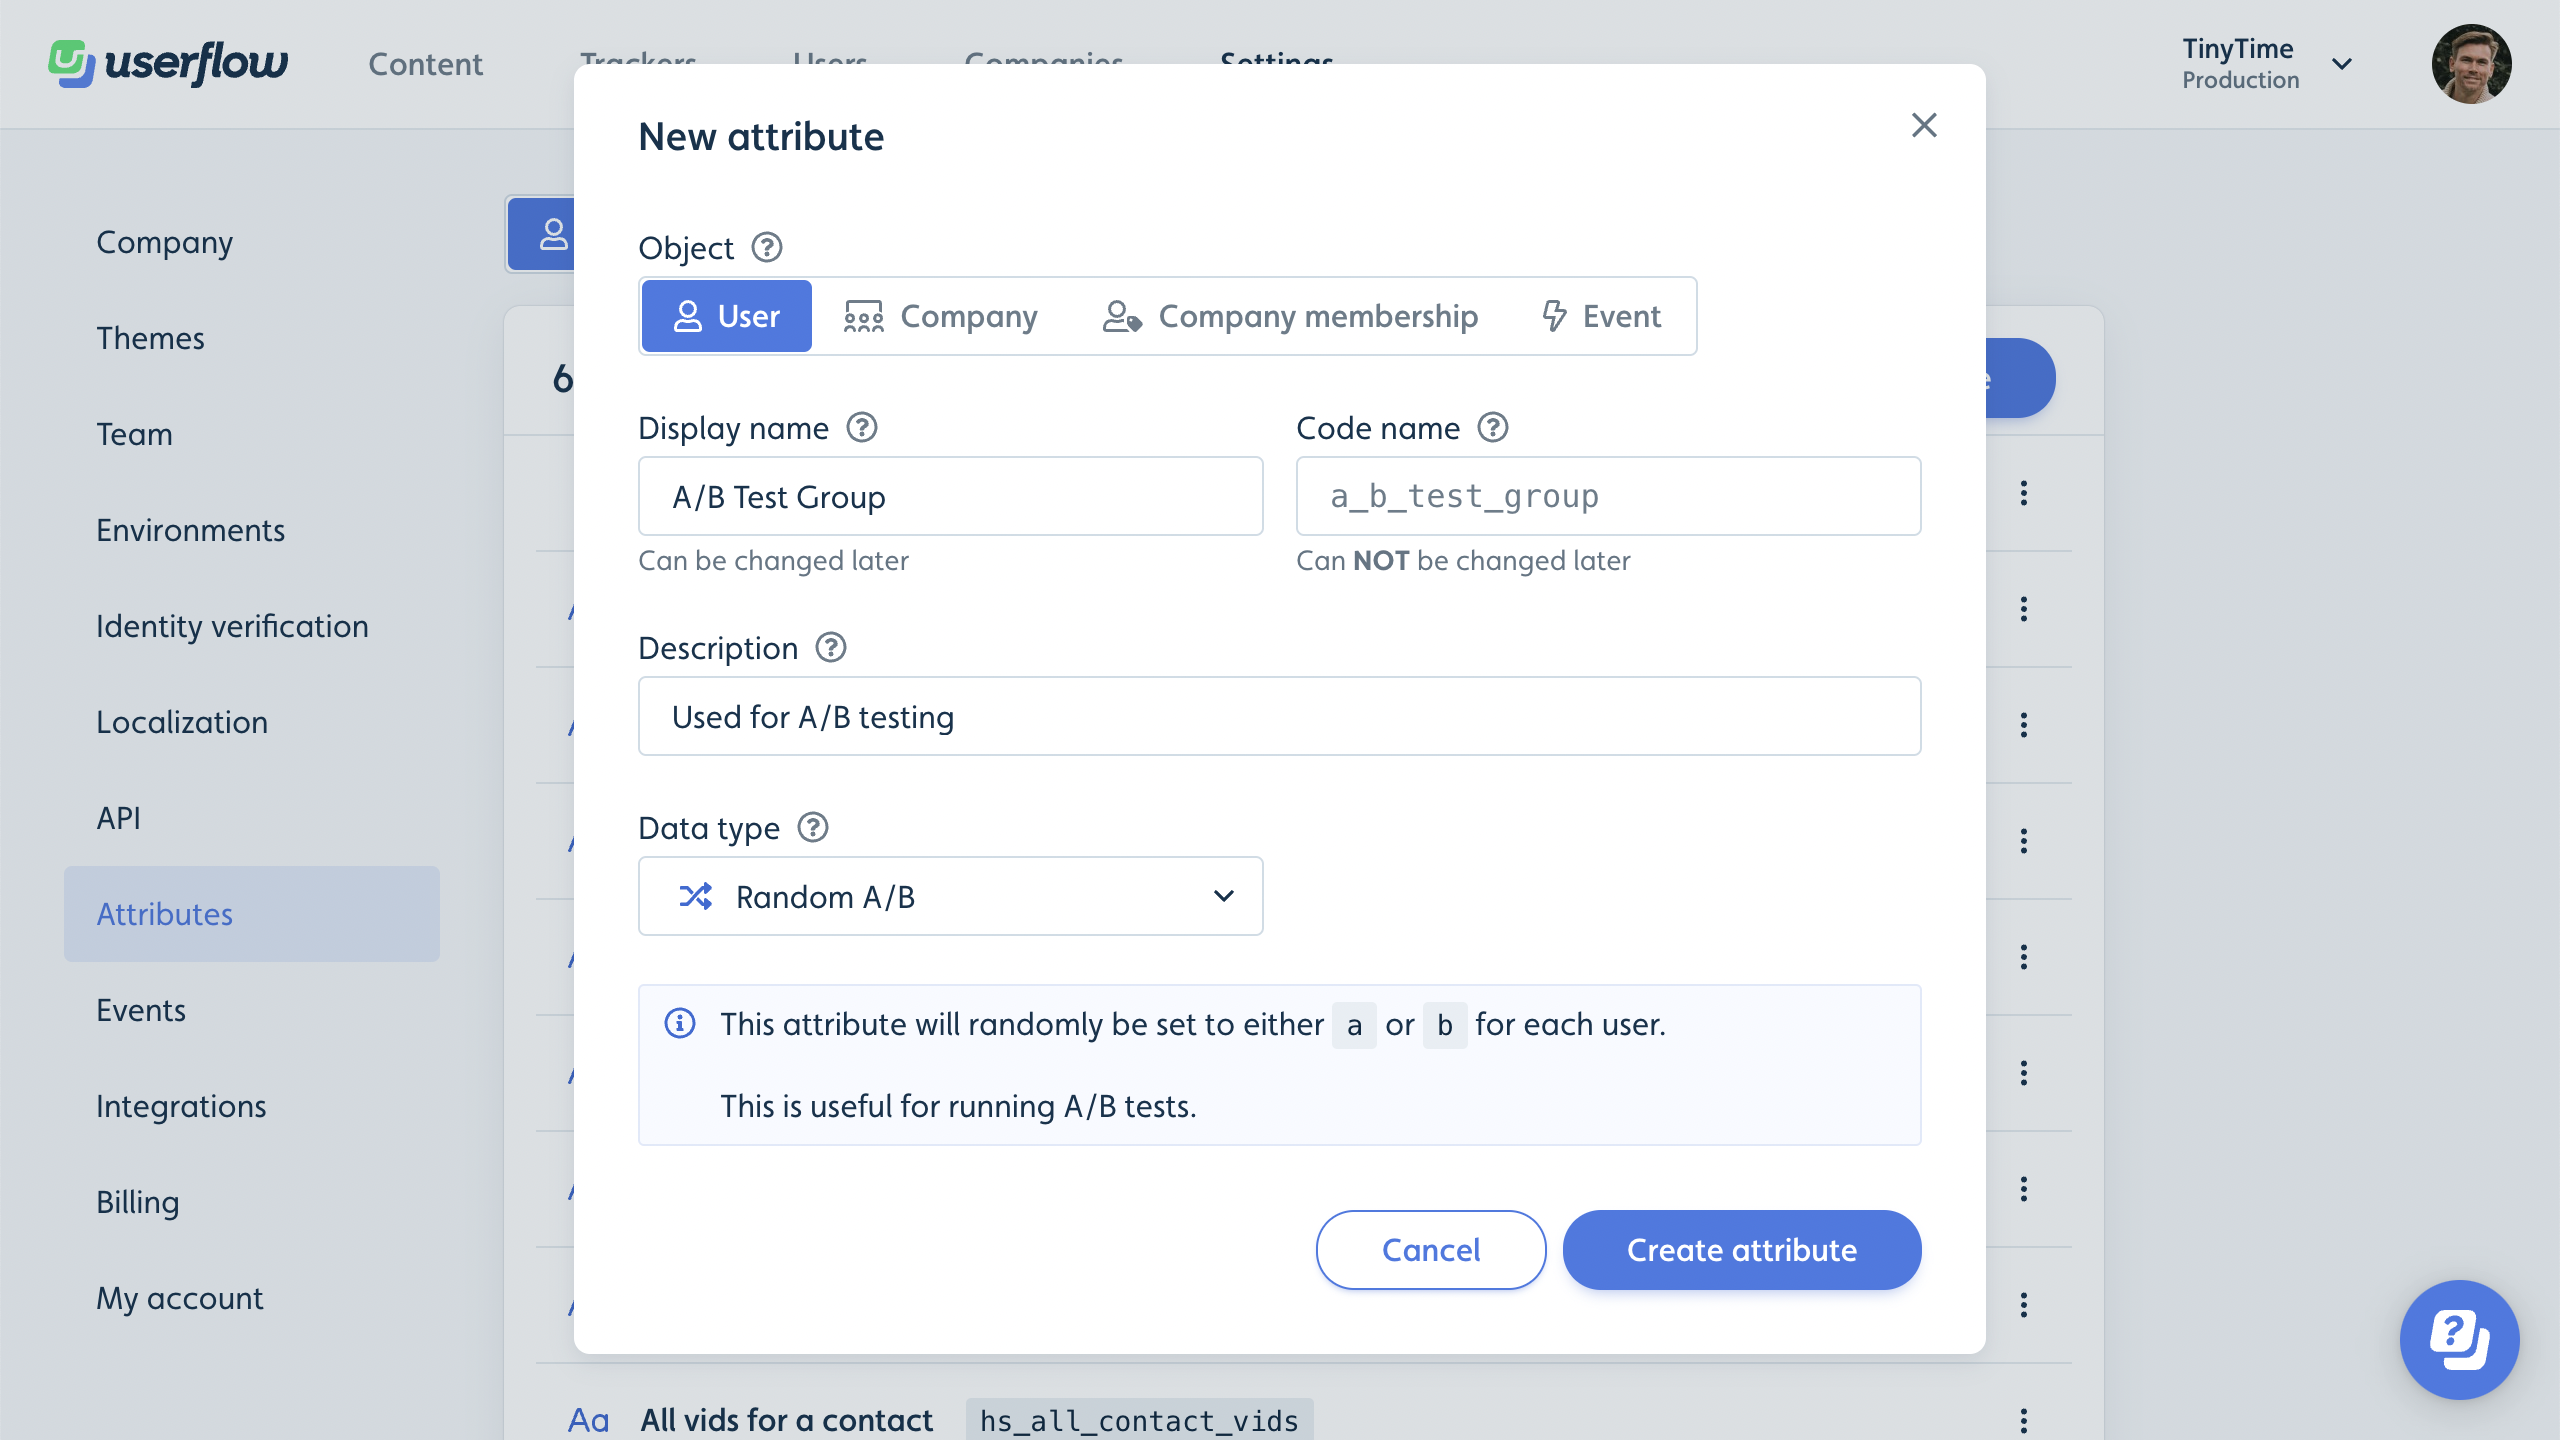
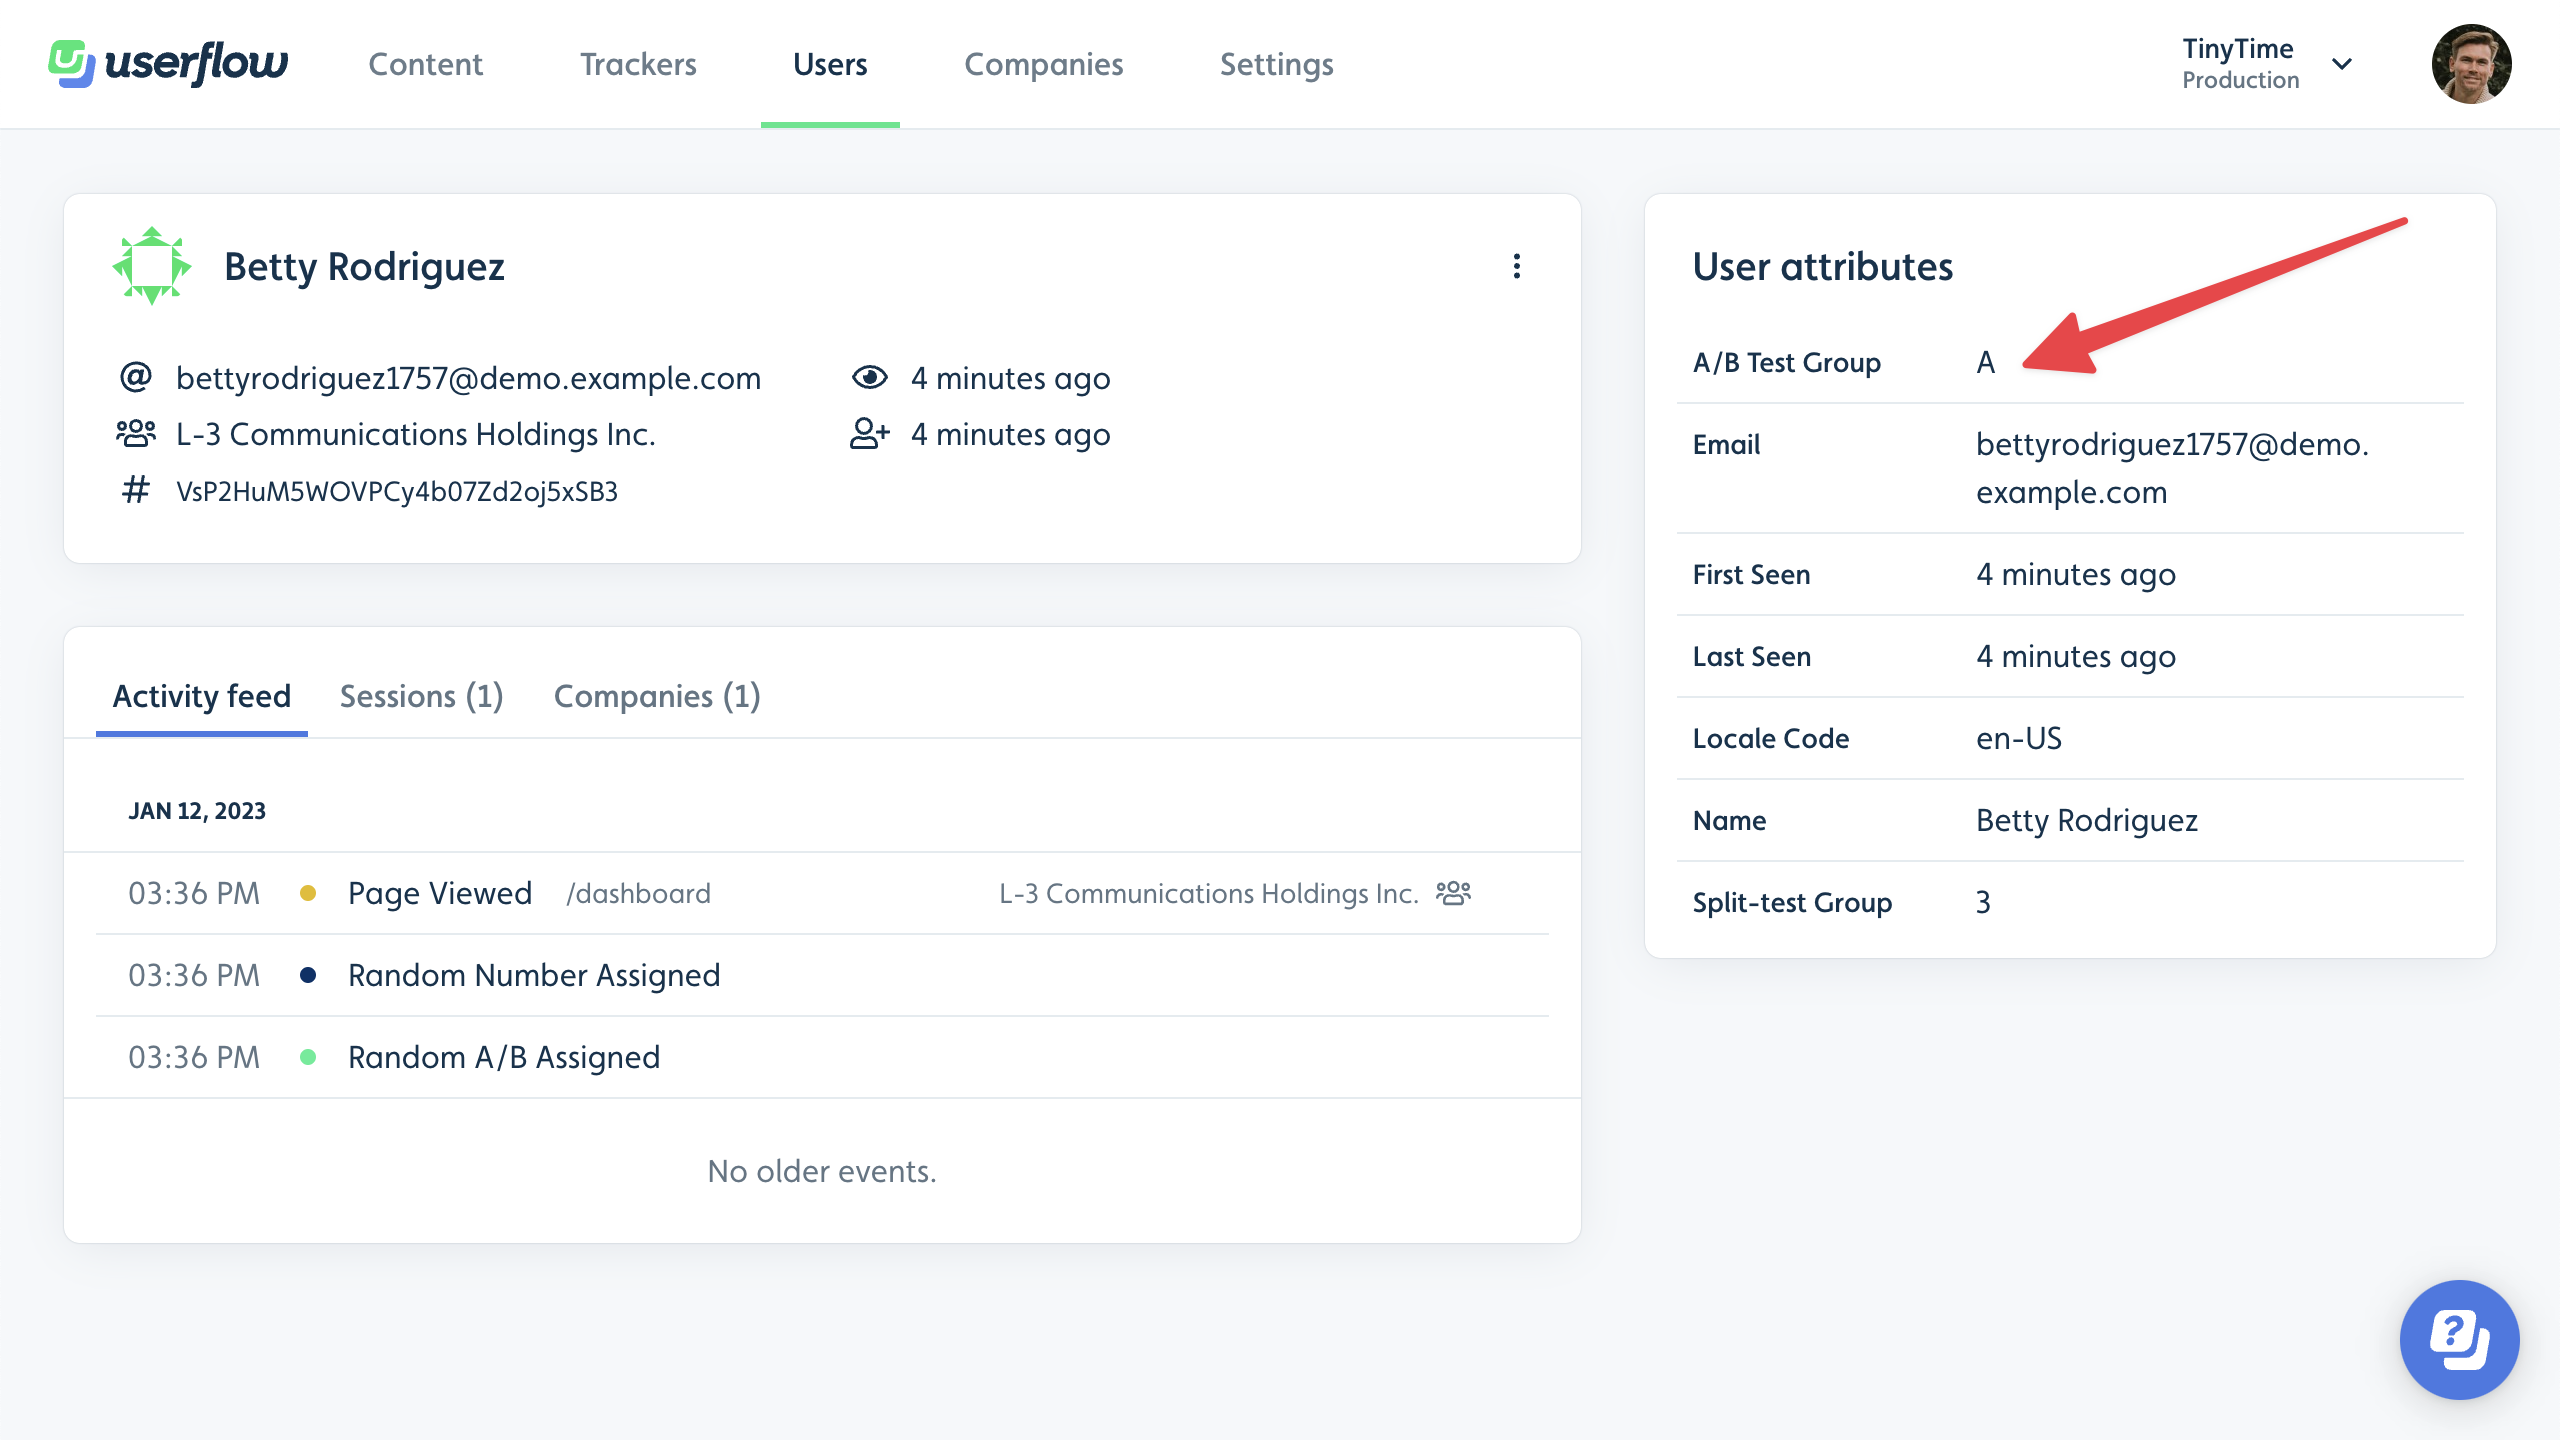
All users will now randomly be assigned an “A” or “B” value for their “A/B Test Group” attribute. You can see this attribute on users’ profile page.
This is a regular attribute, so you can of course use it anywhere else you can use attributes, such as filters in segments, filtering the Analytics page and in flow conditions.
Notice that you can create multiple random attributes if you want to run multiple experiments at the same time. We also have a Random Number attribute, which we’ll discuss more later in this guide.
A/B testing a flow
Here’s how to A/B test a flow that’s set to auto-start for specific users.
- We will assume that you have already built your baseline flow. Let’s call this flow “Flow A” to easily distinguish it. You can change the name of a flow in the builder by clicking the name in the top.
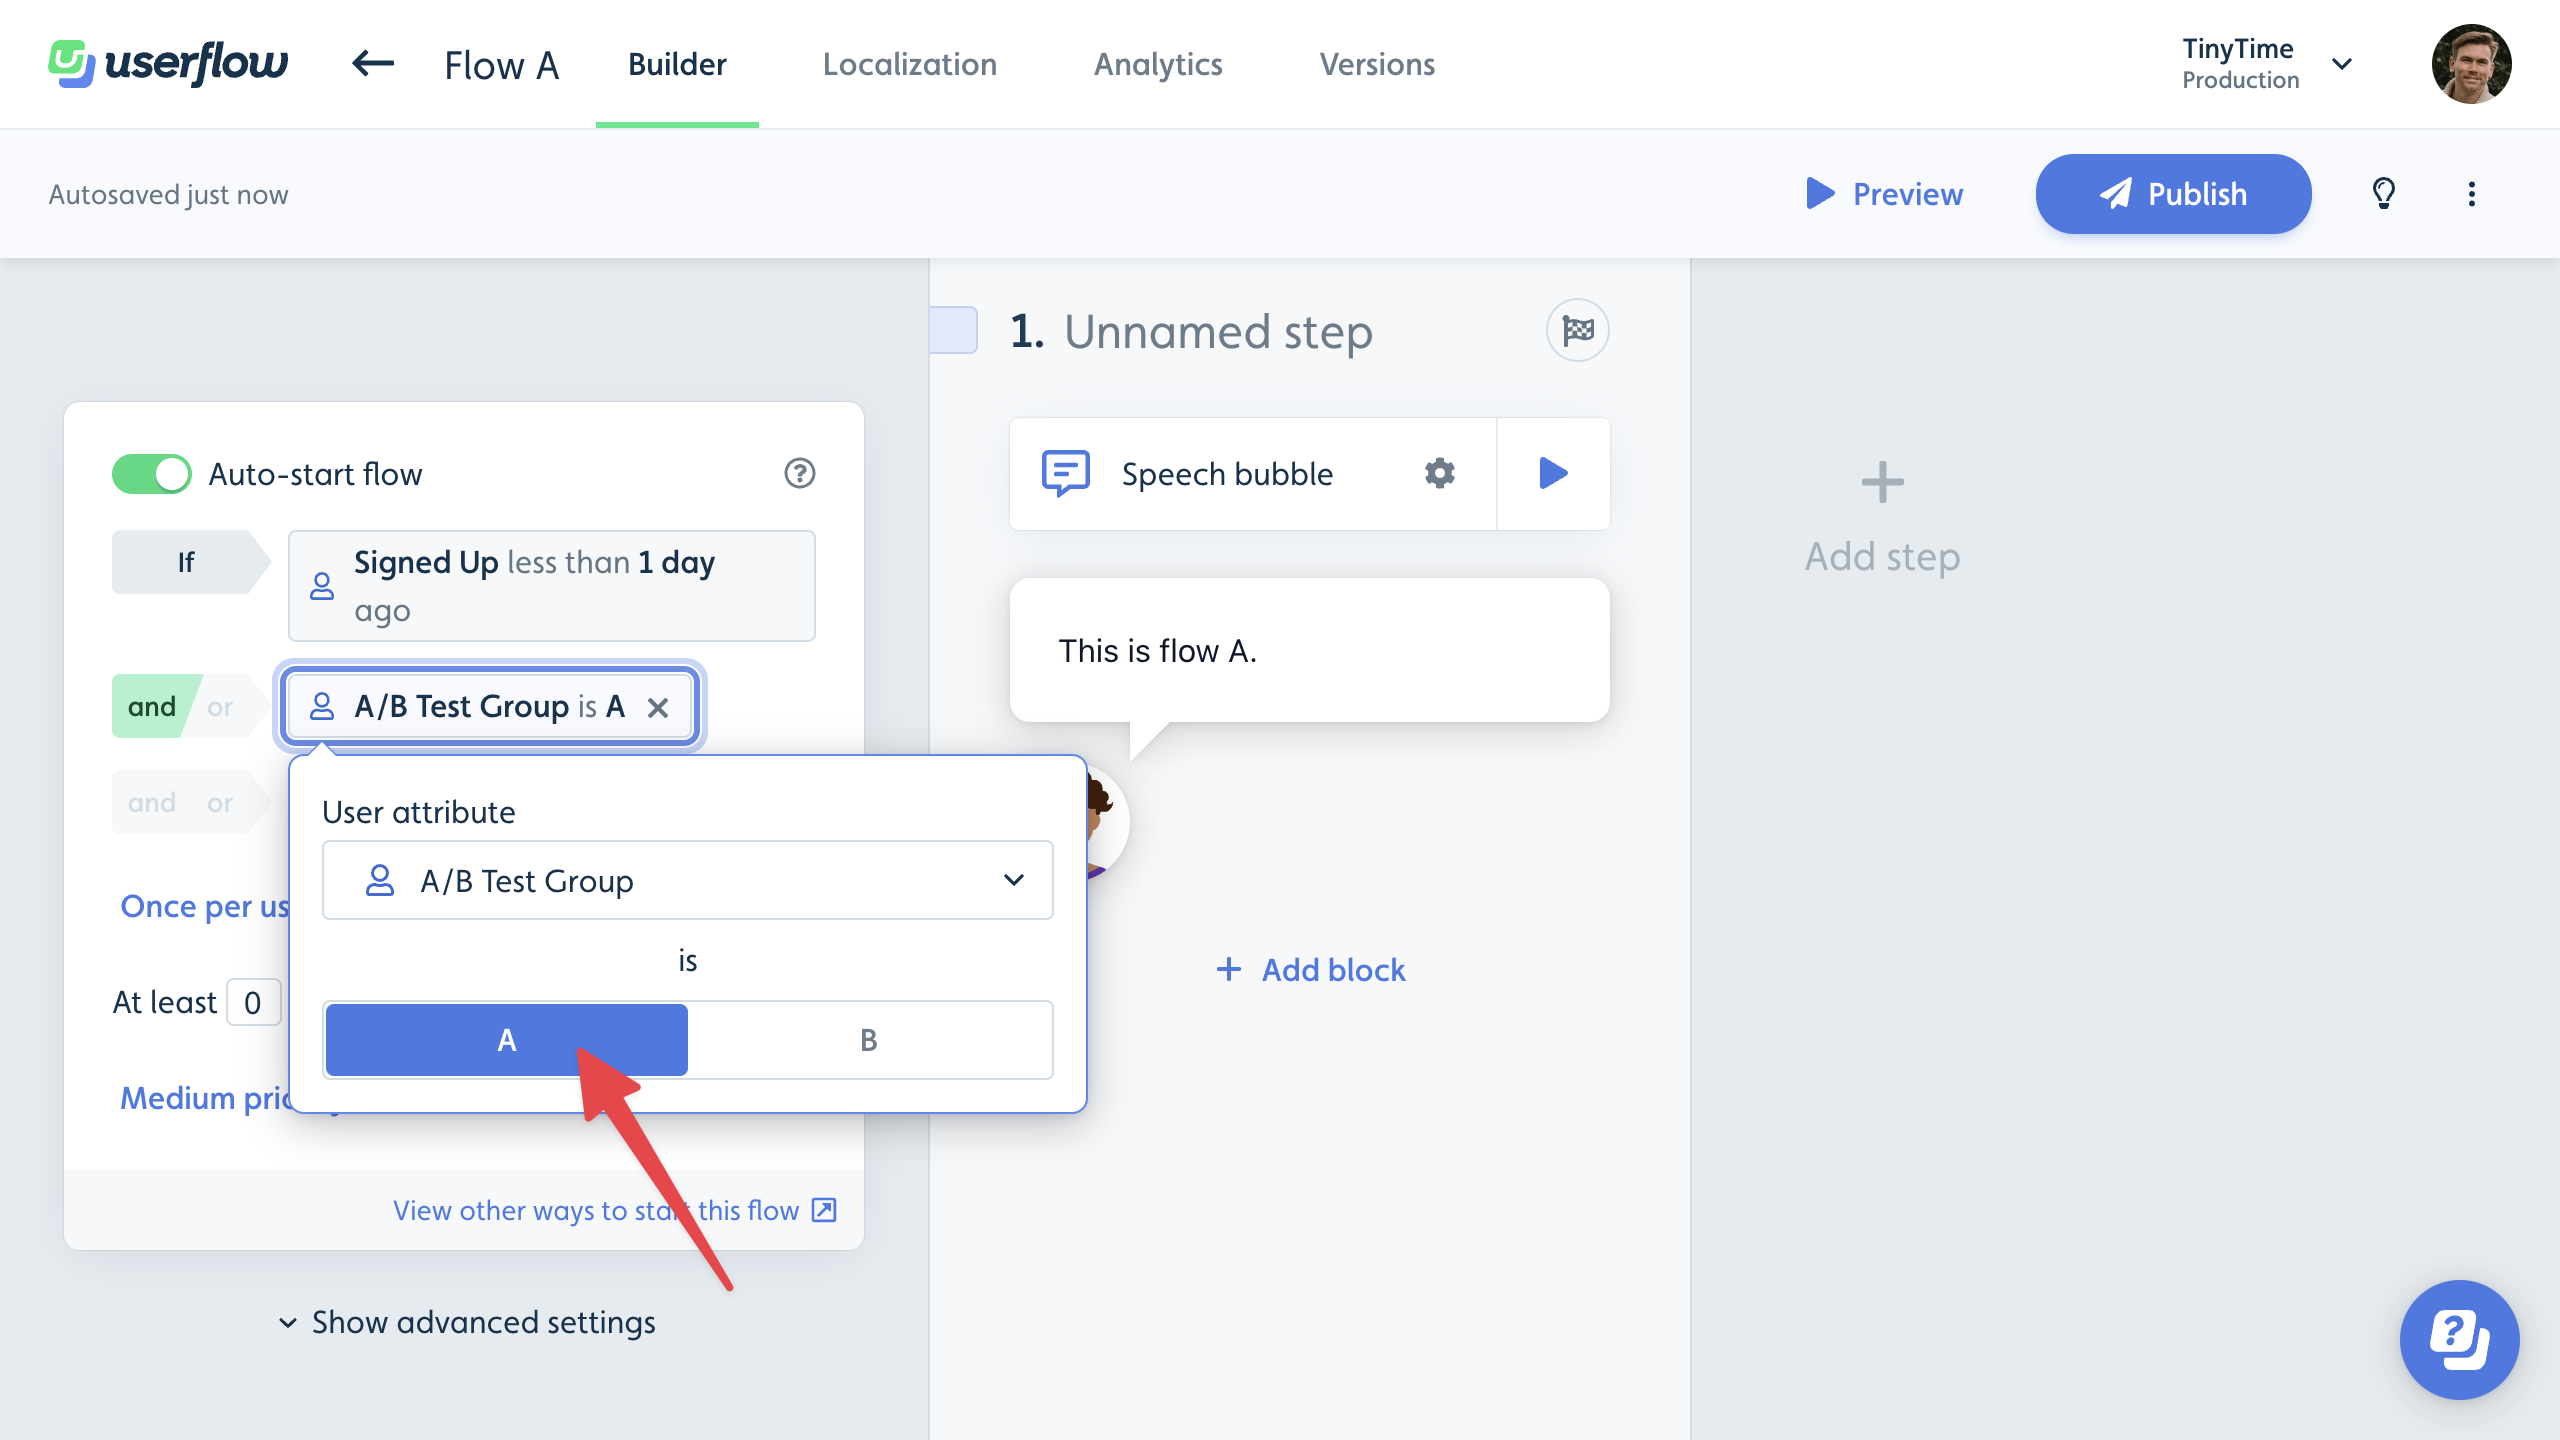
- Click Add condition under Auto-start flow.
- Choose Attribute in the popover menu.
- Pick the random attribute that you created in the previous section (the one we called “A/B Test Group”).
- Select A.
- Now duplicate Flow A via the three-dot button in the top right of the builder.
- Name the duplicated flow “Flow B”.
- Click Flow B’s “A/B Test Group” condition and switch from A to B.
- Make whatever variations to Flow B that you’d like.
- Publish both flows.
Once the flows have been seen by enough users, you can use the Analytics page of each flow to decide which one performs best. Or use your analytics provider. When you pick a winner, simply unpublish the loser, remove the “A/B Test Group” condition from the winner and publish it.
A/B testing other things
You can use a condition for the “A/B Test Group” attribute the same way in other places.
You could for example have 1 flow with 2 different buttons (one for the A group and one for the B group). Use the “Hide button if” feature for both buttons and add an “A/B Test Group” condition.
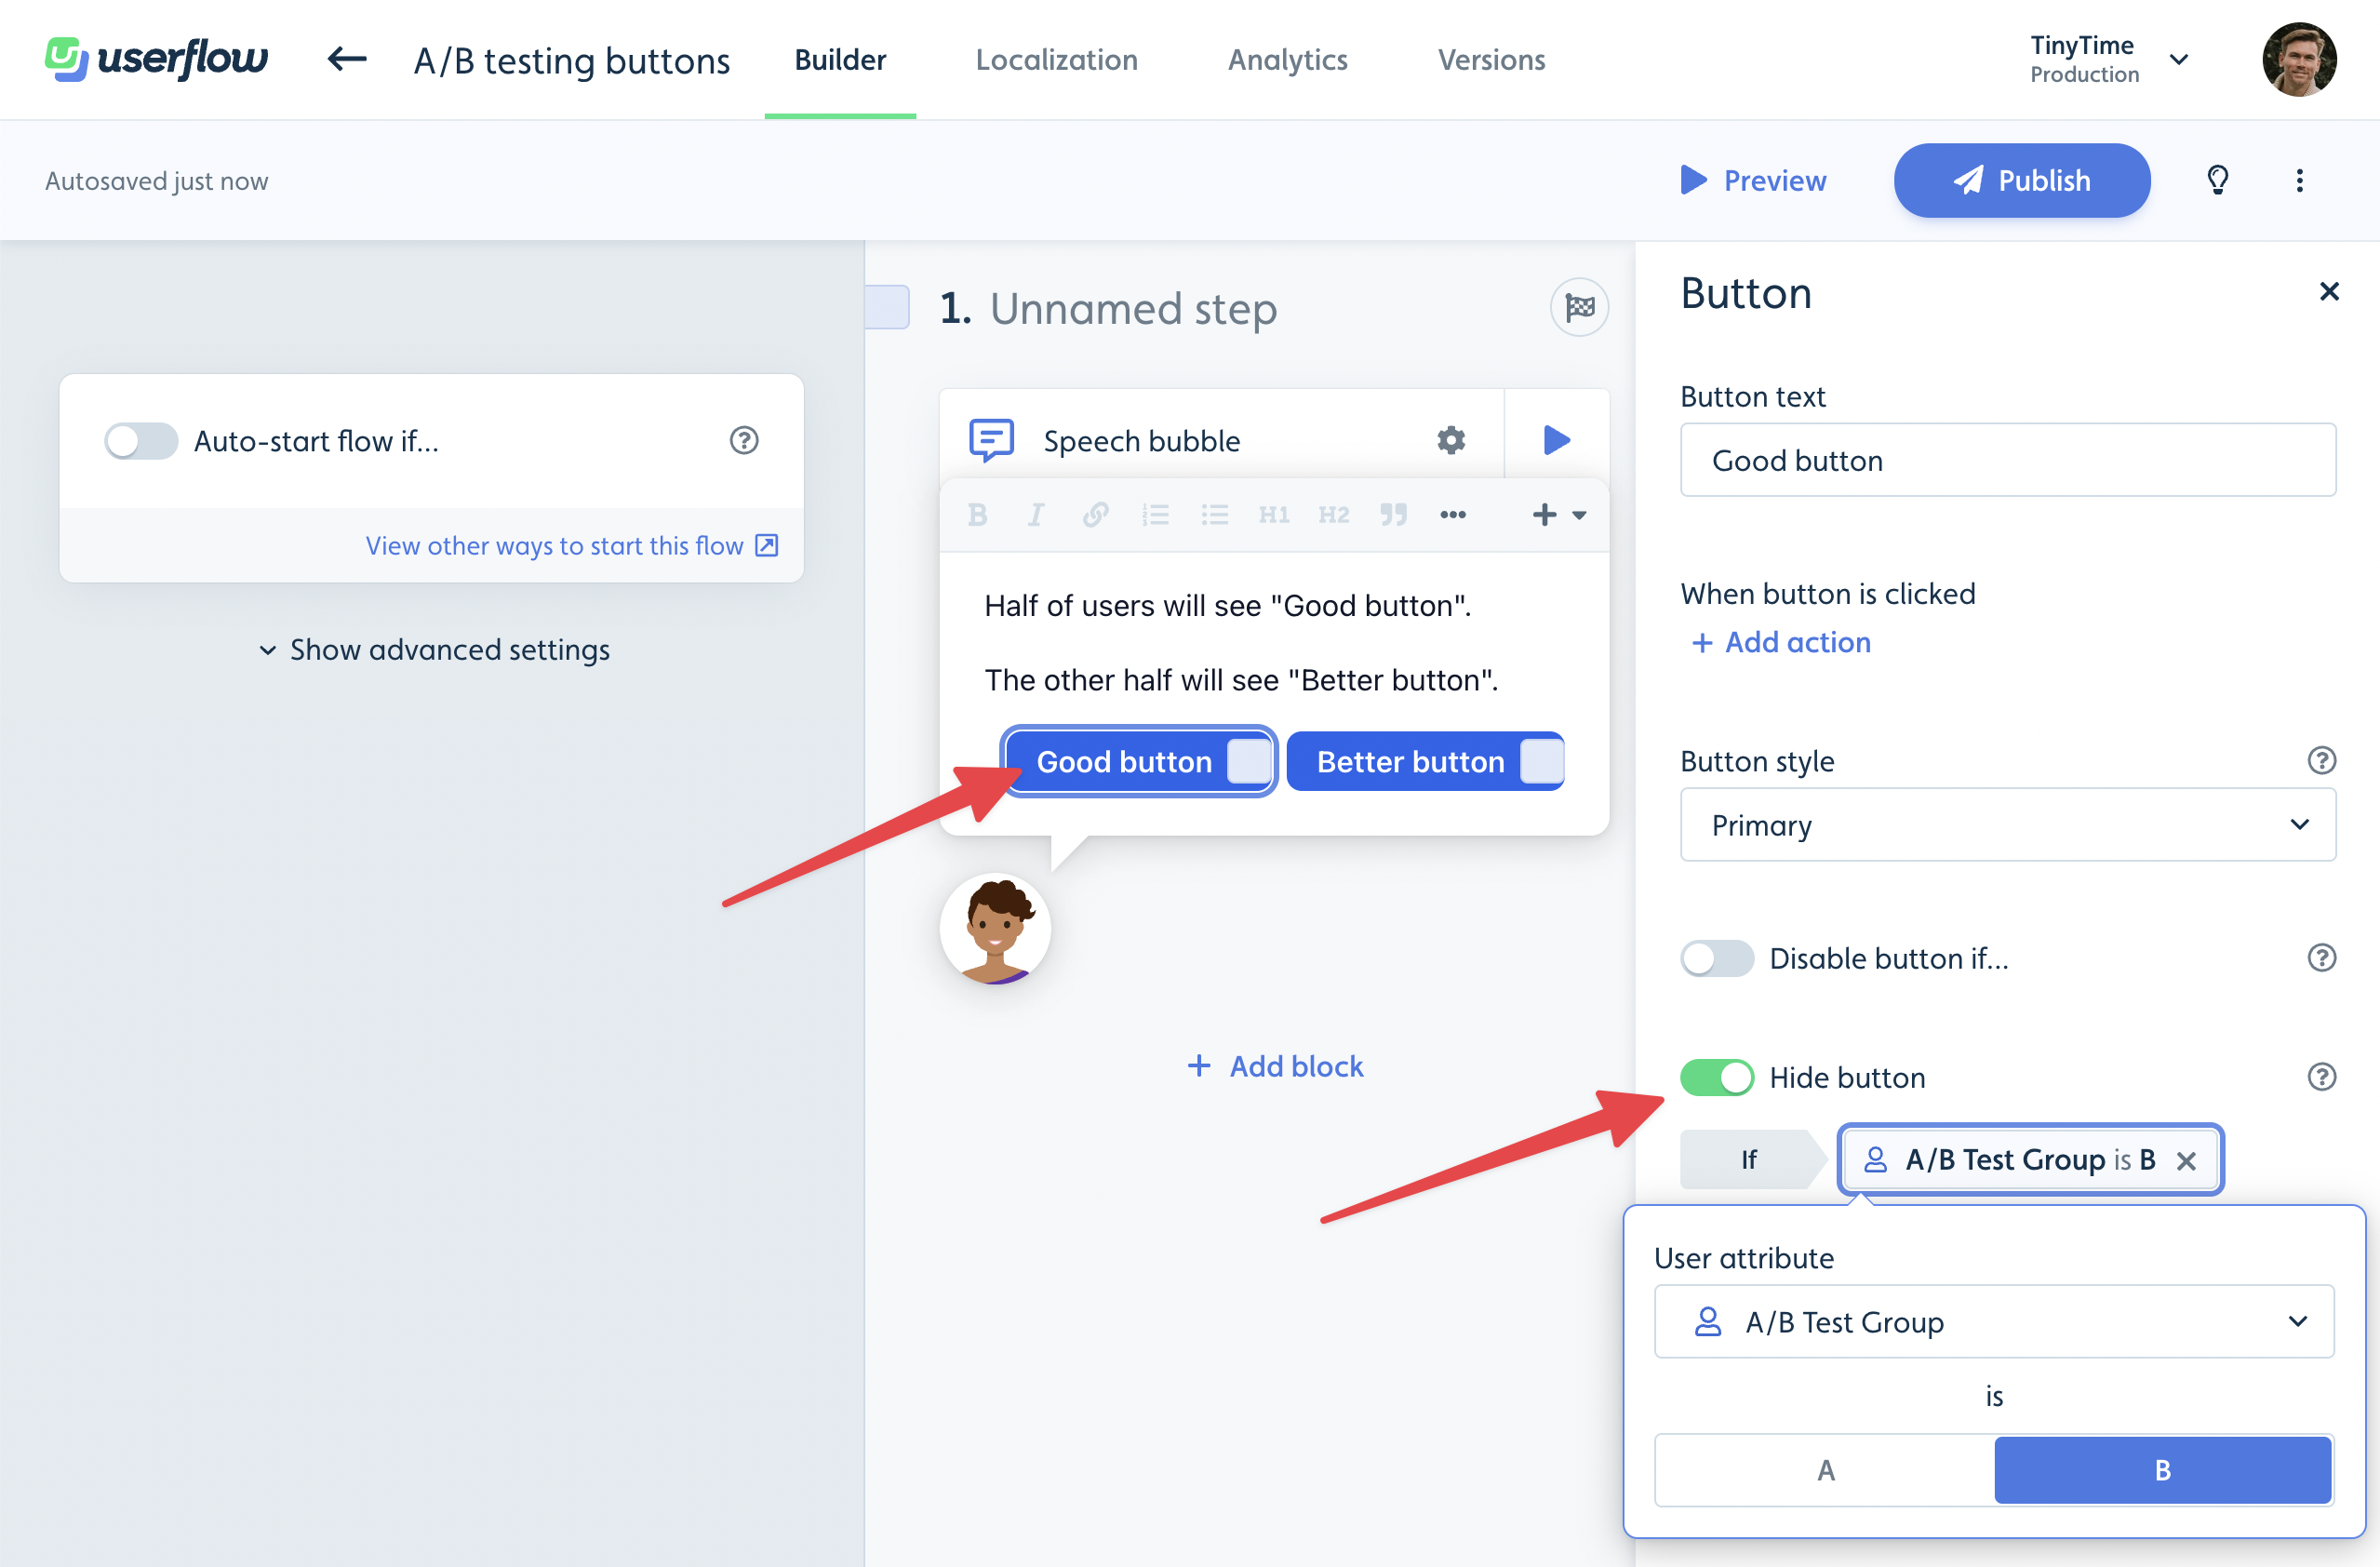
Other places are in checklist tasks, resource center blocks, launchers etc.
Split-testing with more than 2 groups
If you’d like to run an experiment with more than 2 groups, then you can set up Random number attribute instead:
- Go to Settings → Attributes.
- Click New attribute.
- Enter a Display name such as “Split-test Group”.
- Under Between, enter the number of groups you want. If you want 3 groups, then enter 3, which will make Userflow assign a random number between 1 and 3 (both included) to each user.
- Click Create attribute.
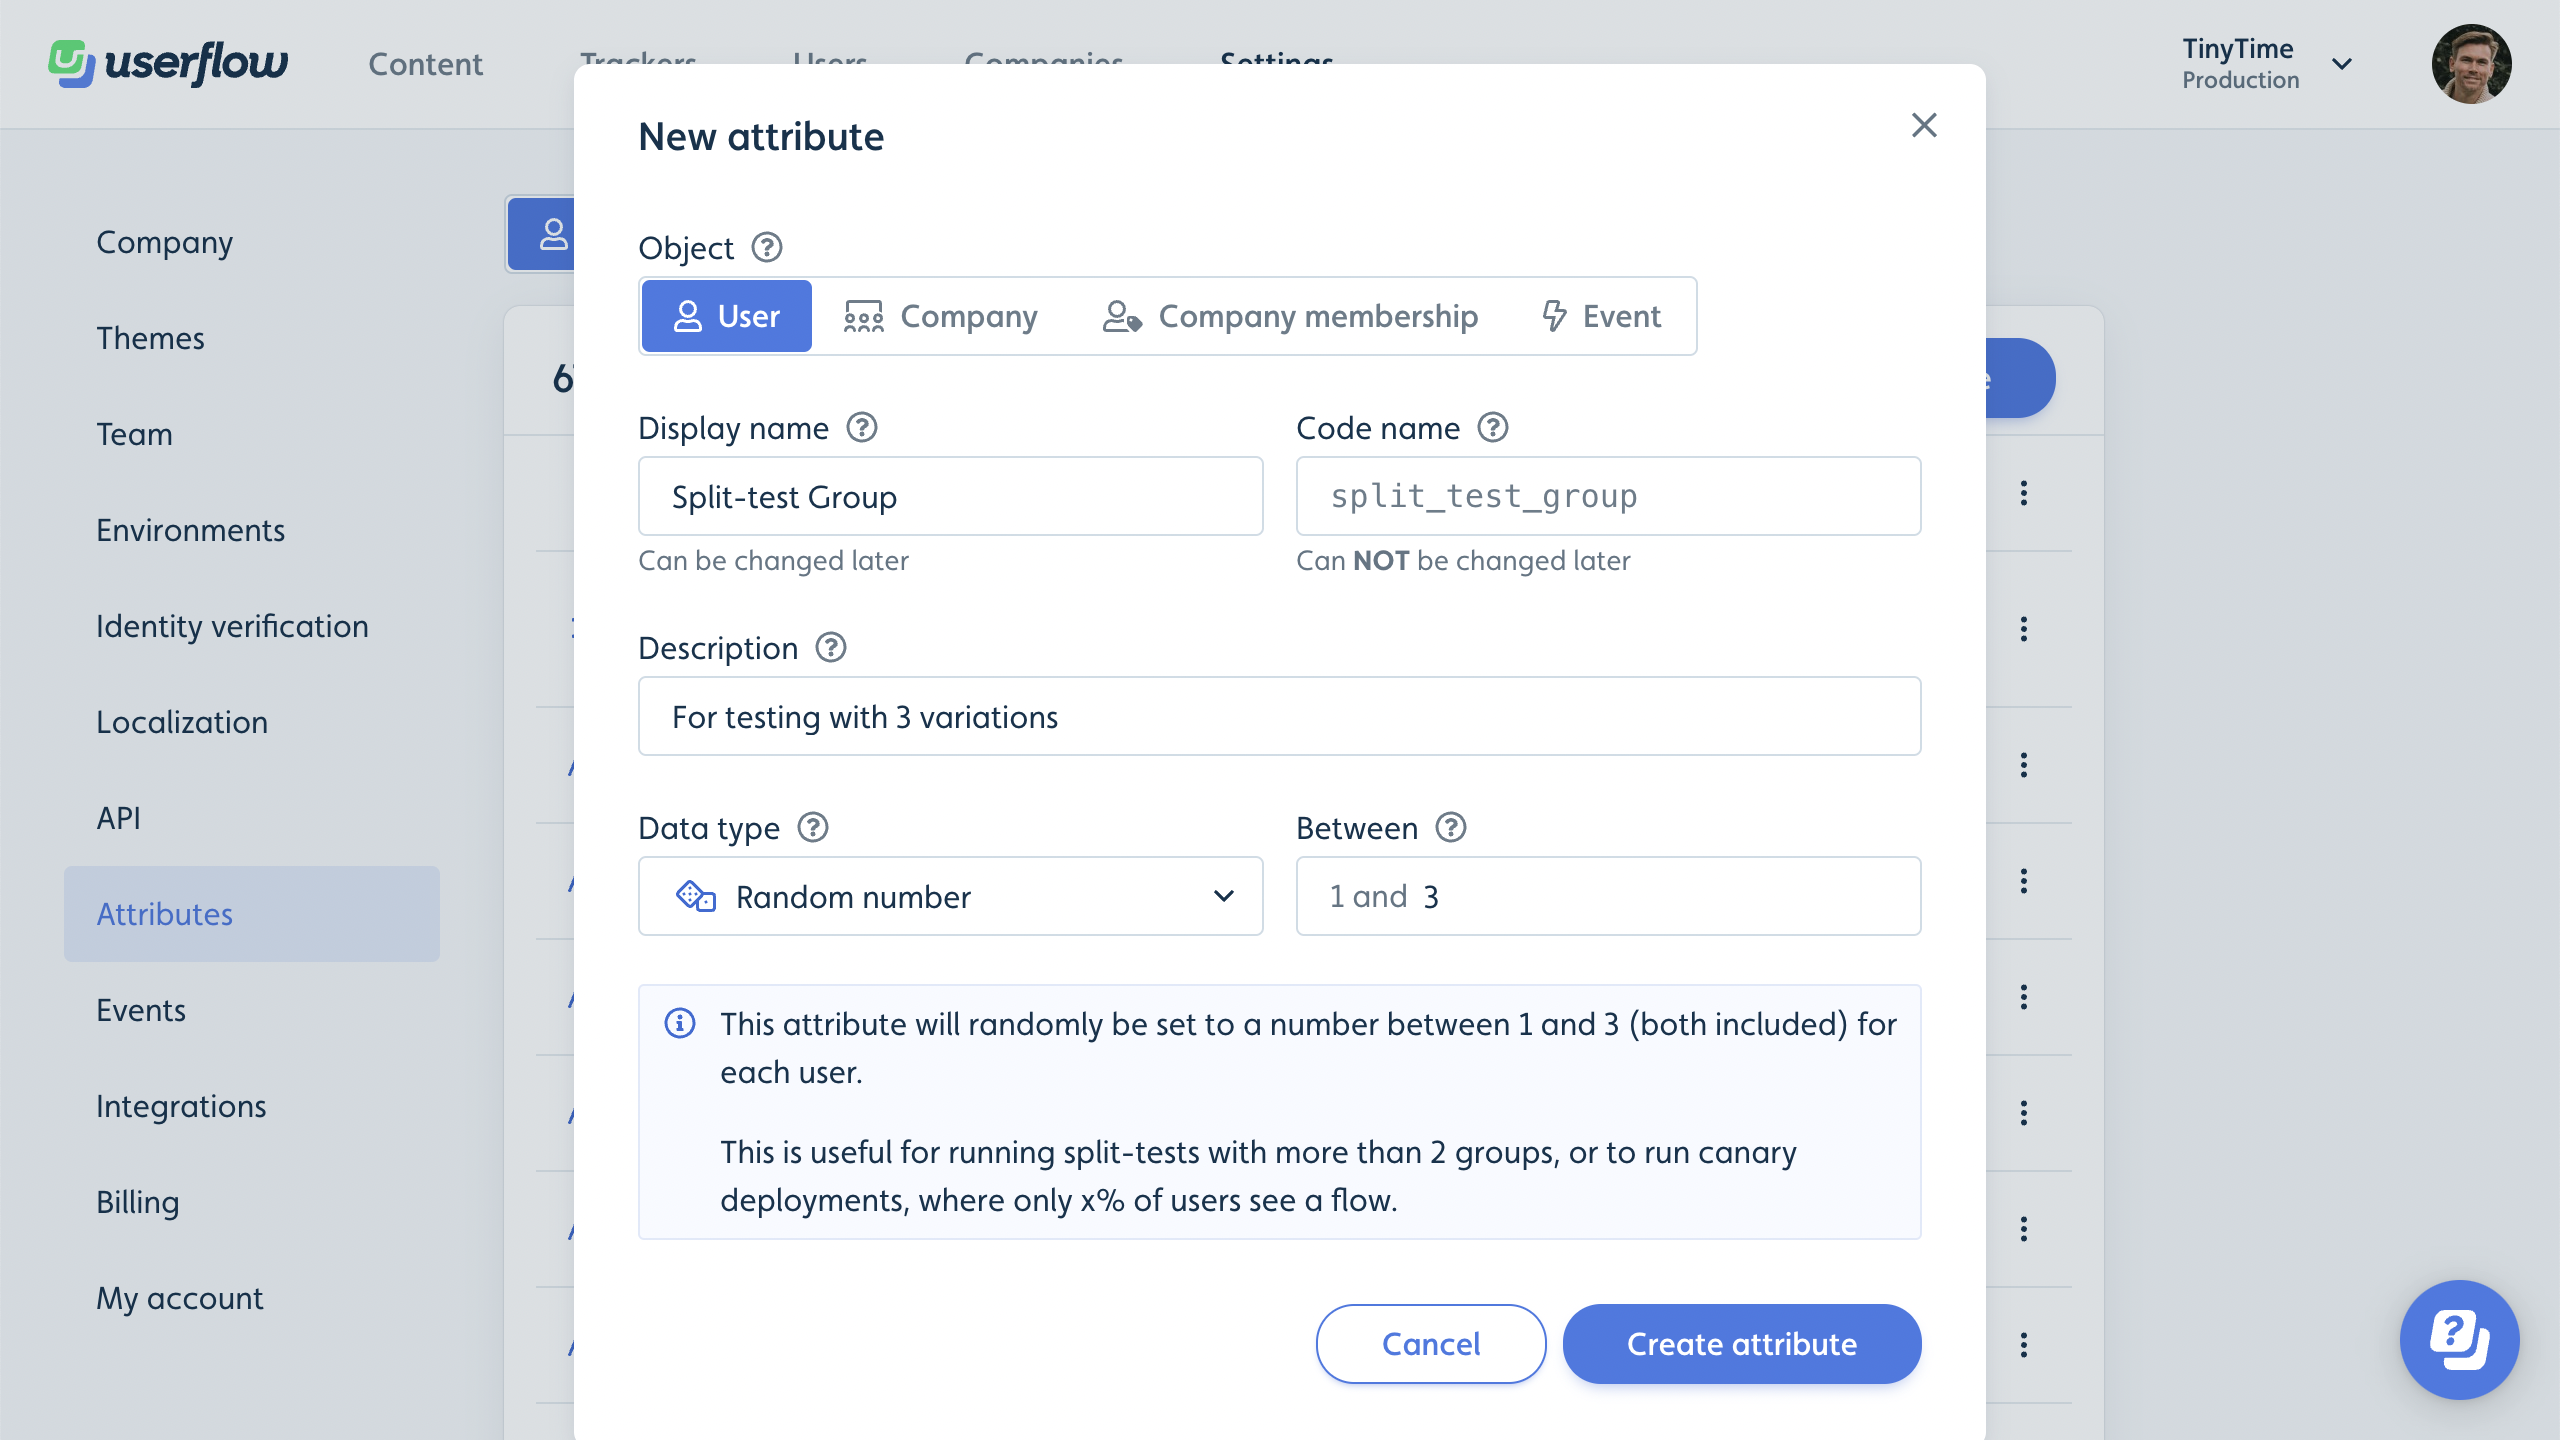
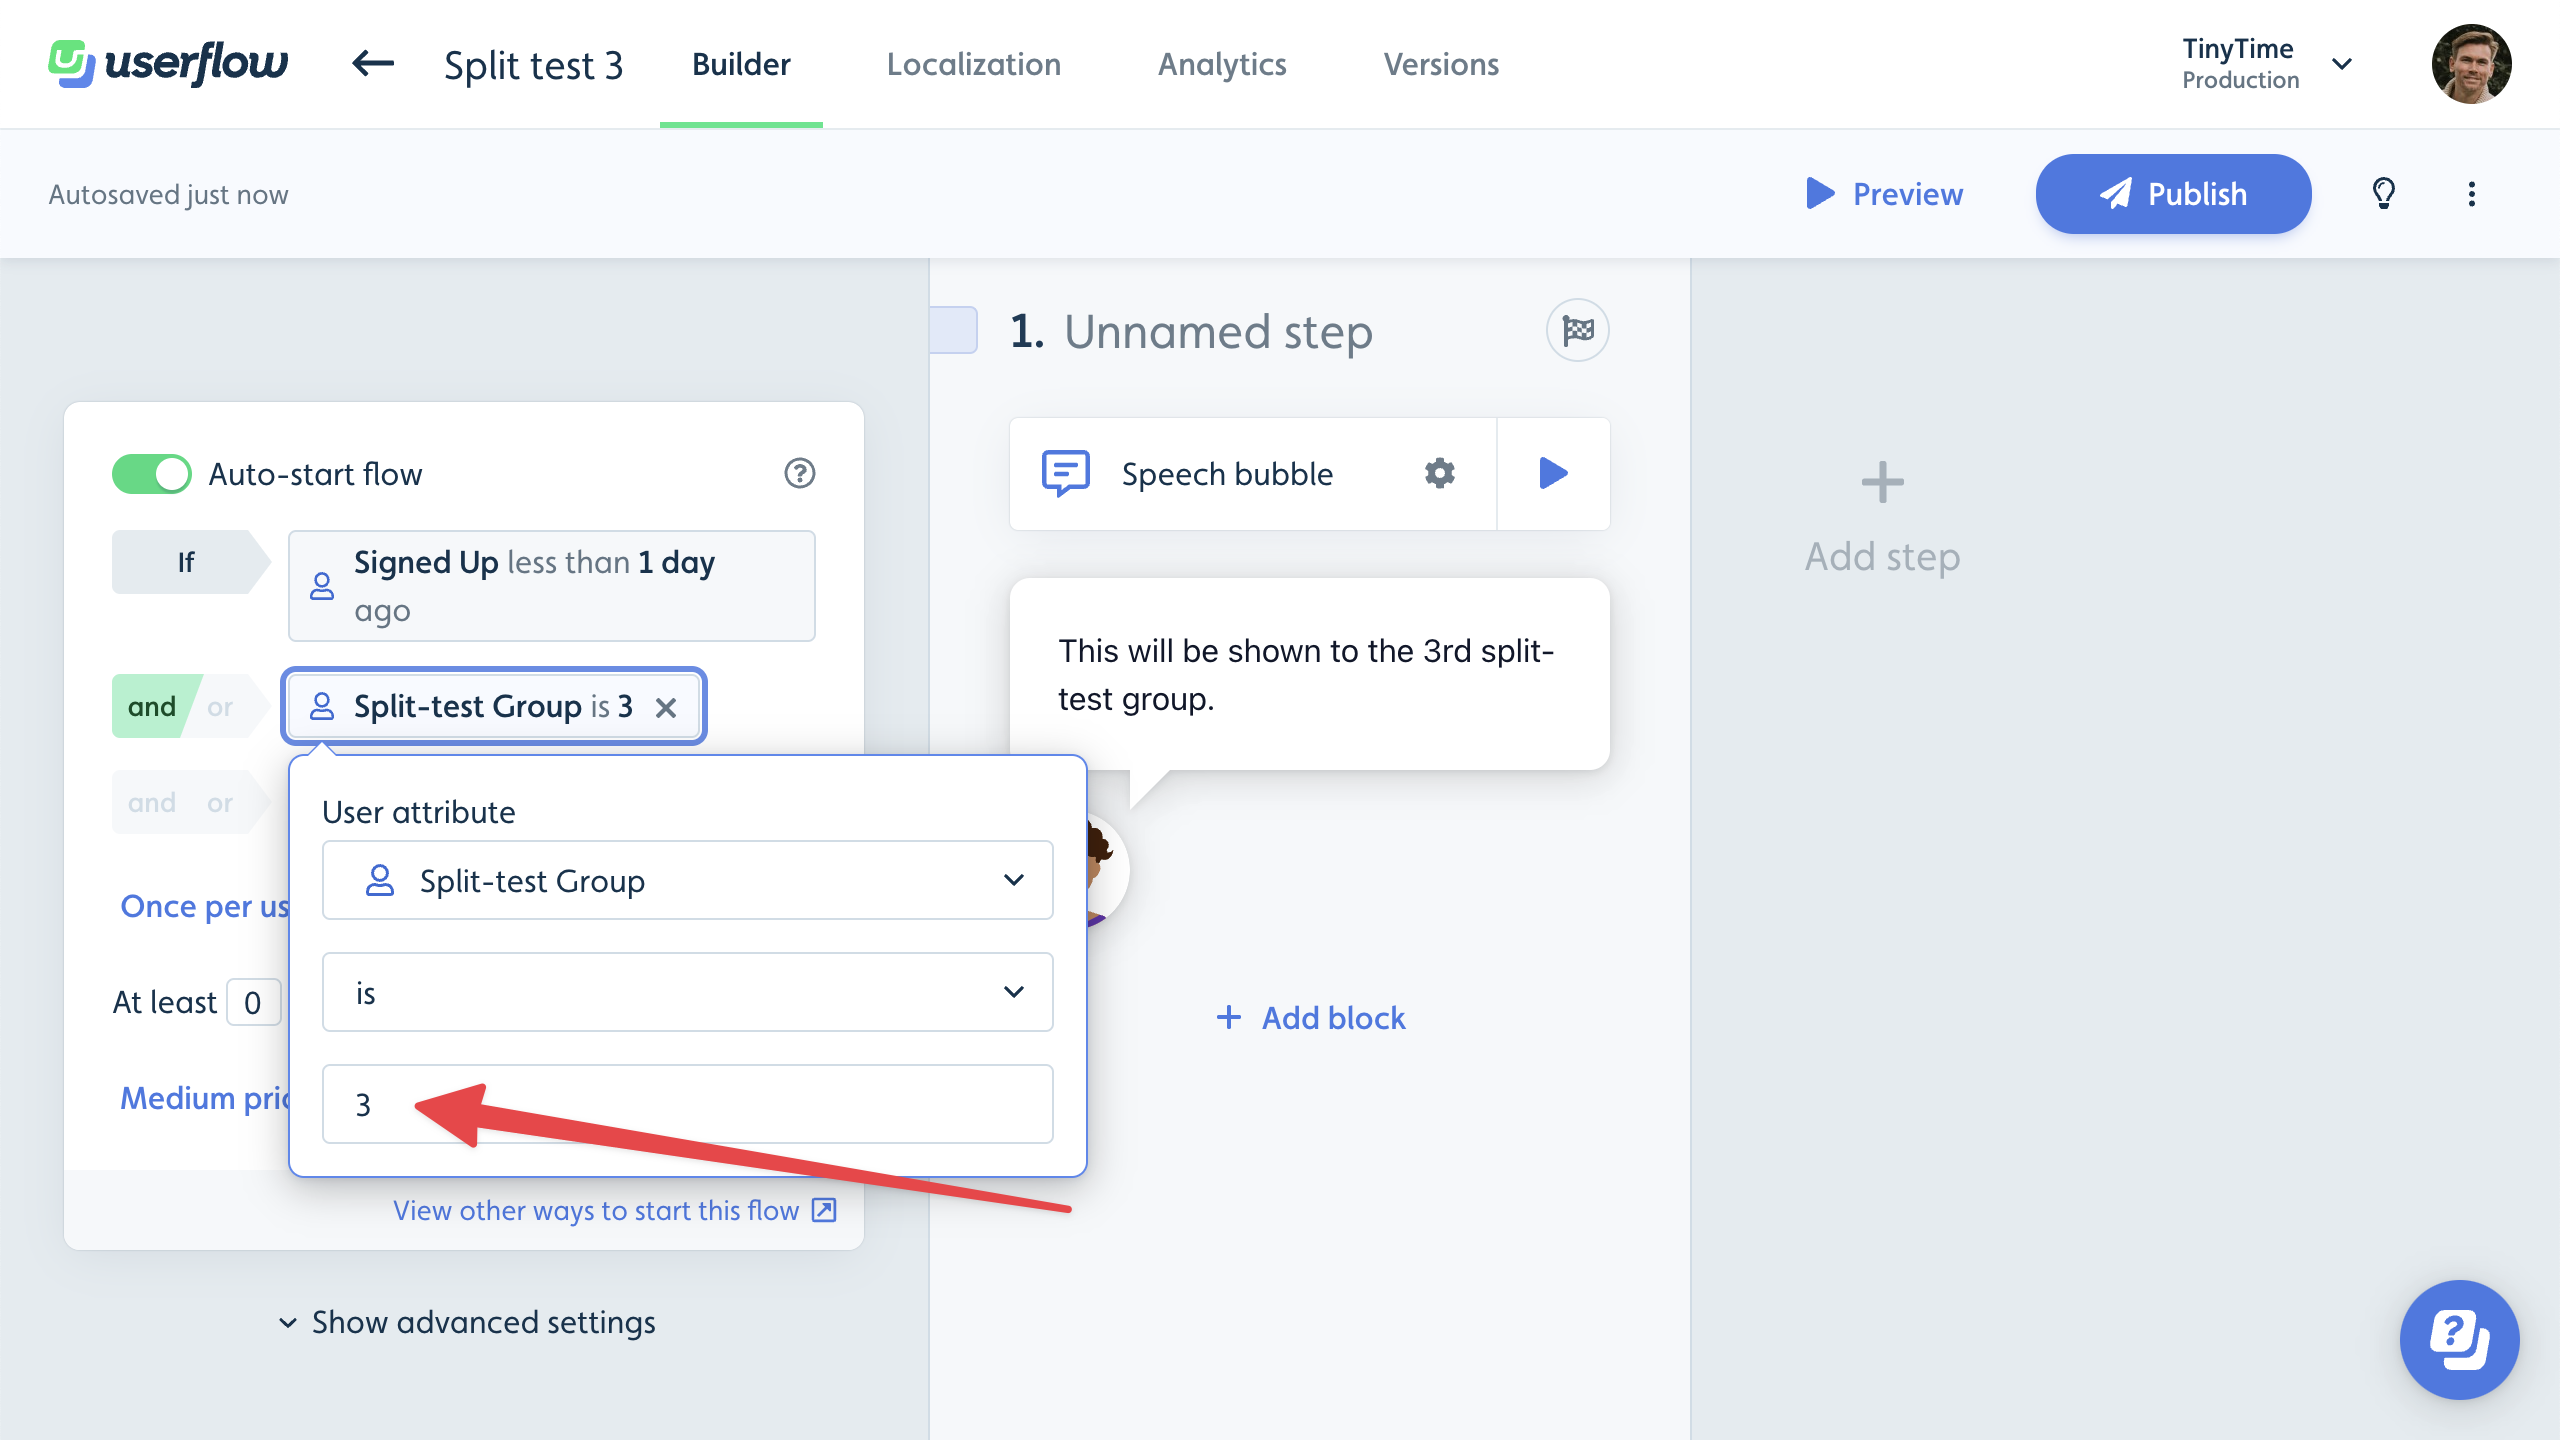
Now use the “Split-test Group” attribute just like we used the “A/B Test Group” above.
Using random attribute values in your analytics provider
When a random attribute is assigned to a user, we also track an event containing the name of the attribute and the specific value that was randomly chosen.
For Random A/B attributes, we track an event named random_ab_assigned. For Random Number attributes, we track an event named random_number_assigned.

These events will be streamed into your analytics provider, such as Mixpanel, Heap, or Amplitude. If you have not set up your analytics provider yet, then see Integrations.
You can use these events in your analytics provider to filter users.
